
How to automatically free up space on a Windows 11 PC?
Having space on your computer permanently requires a certain amount of attention from the user. In fact, it should regularly maintain its storage space to prevent its saturation and the possible unwanted effects (slowdowns…) that this entails.
To do this, he must do some cleaning on his device’s hard drive by getting rid of all unnecessary files (large files in the download folder, items in the trash, temporary files, etc.). This process must be repeated periodically to keep the computer in good working order.
But instead of carrying out this time-consuming task by itself, the user can entrust it to the Windows 11 Storage Assistant. In fact, this assistant, when properly configured, can automatically free up space on the Windows 11 PC. Make use of this tool Here are the different steps to follow to get there easily.
Step 1: Access Windows 11’s Settings
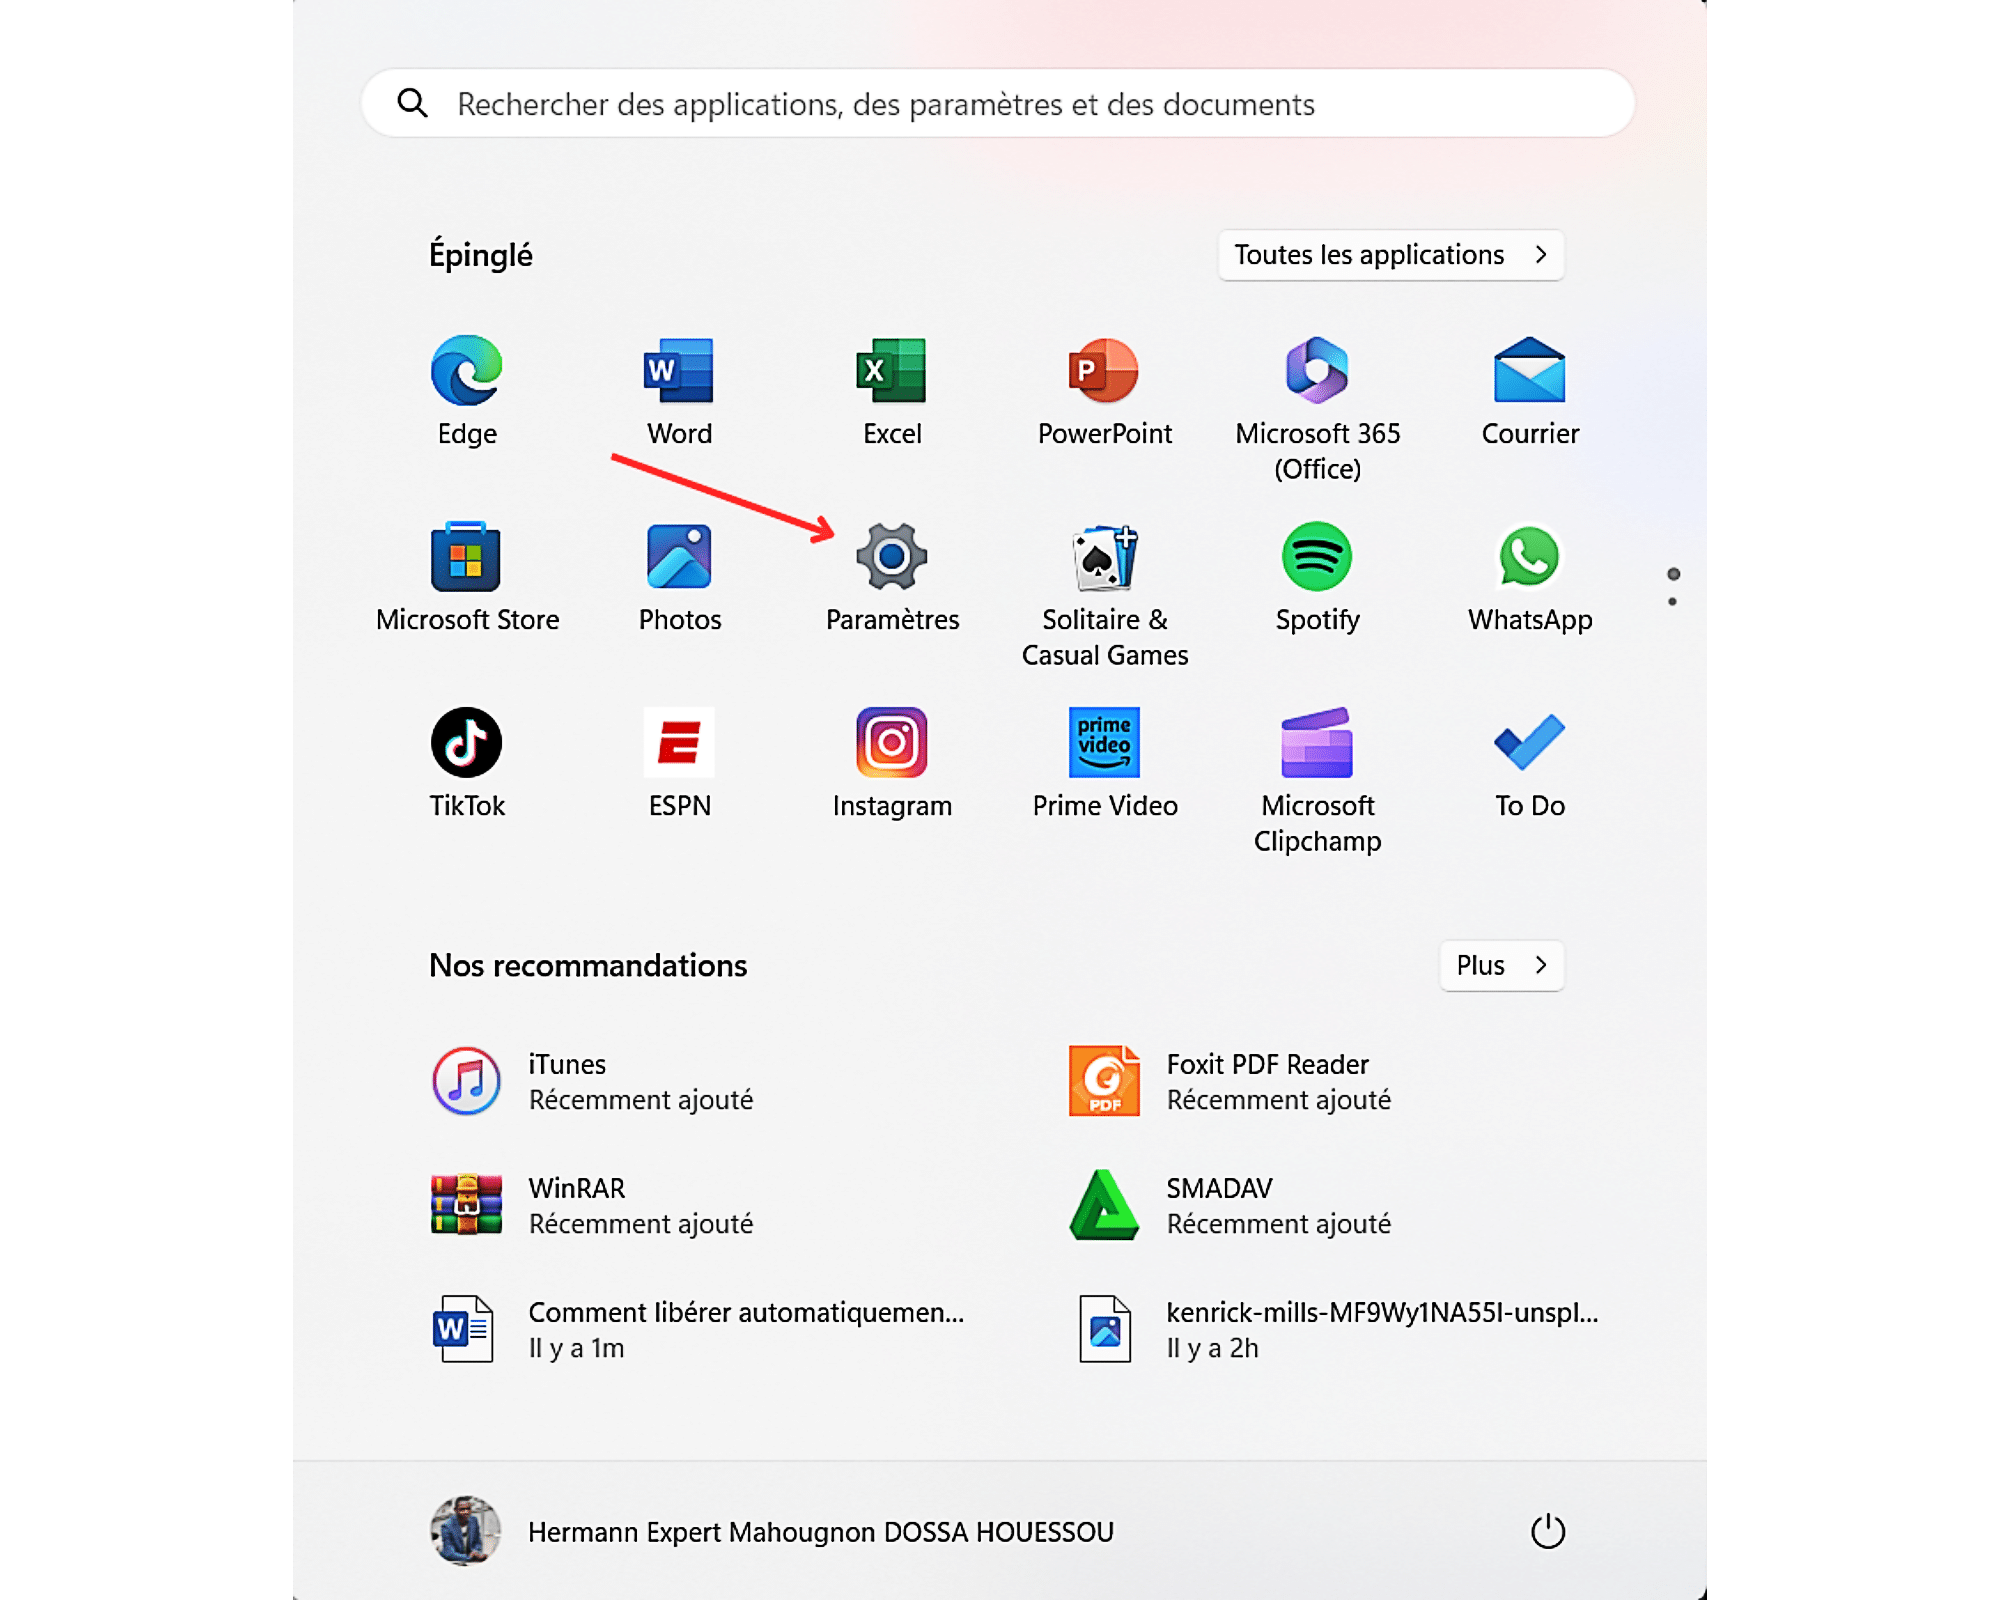
To free up space automatically on your Windows 11 computer, you must first go to the ” Settings From the computer. You can use a keyboard shortcut Windows + i or browse the list to start To arrive there.
To use this second option, first press “ windows on your keyboard. Next, select ” Settings “Among the pinned items in the list” to start “.
Step 2: Turn on Storage Sense
after going to Settings “From the computer, you should now activate” storage wizard So, proceed as follows:
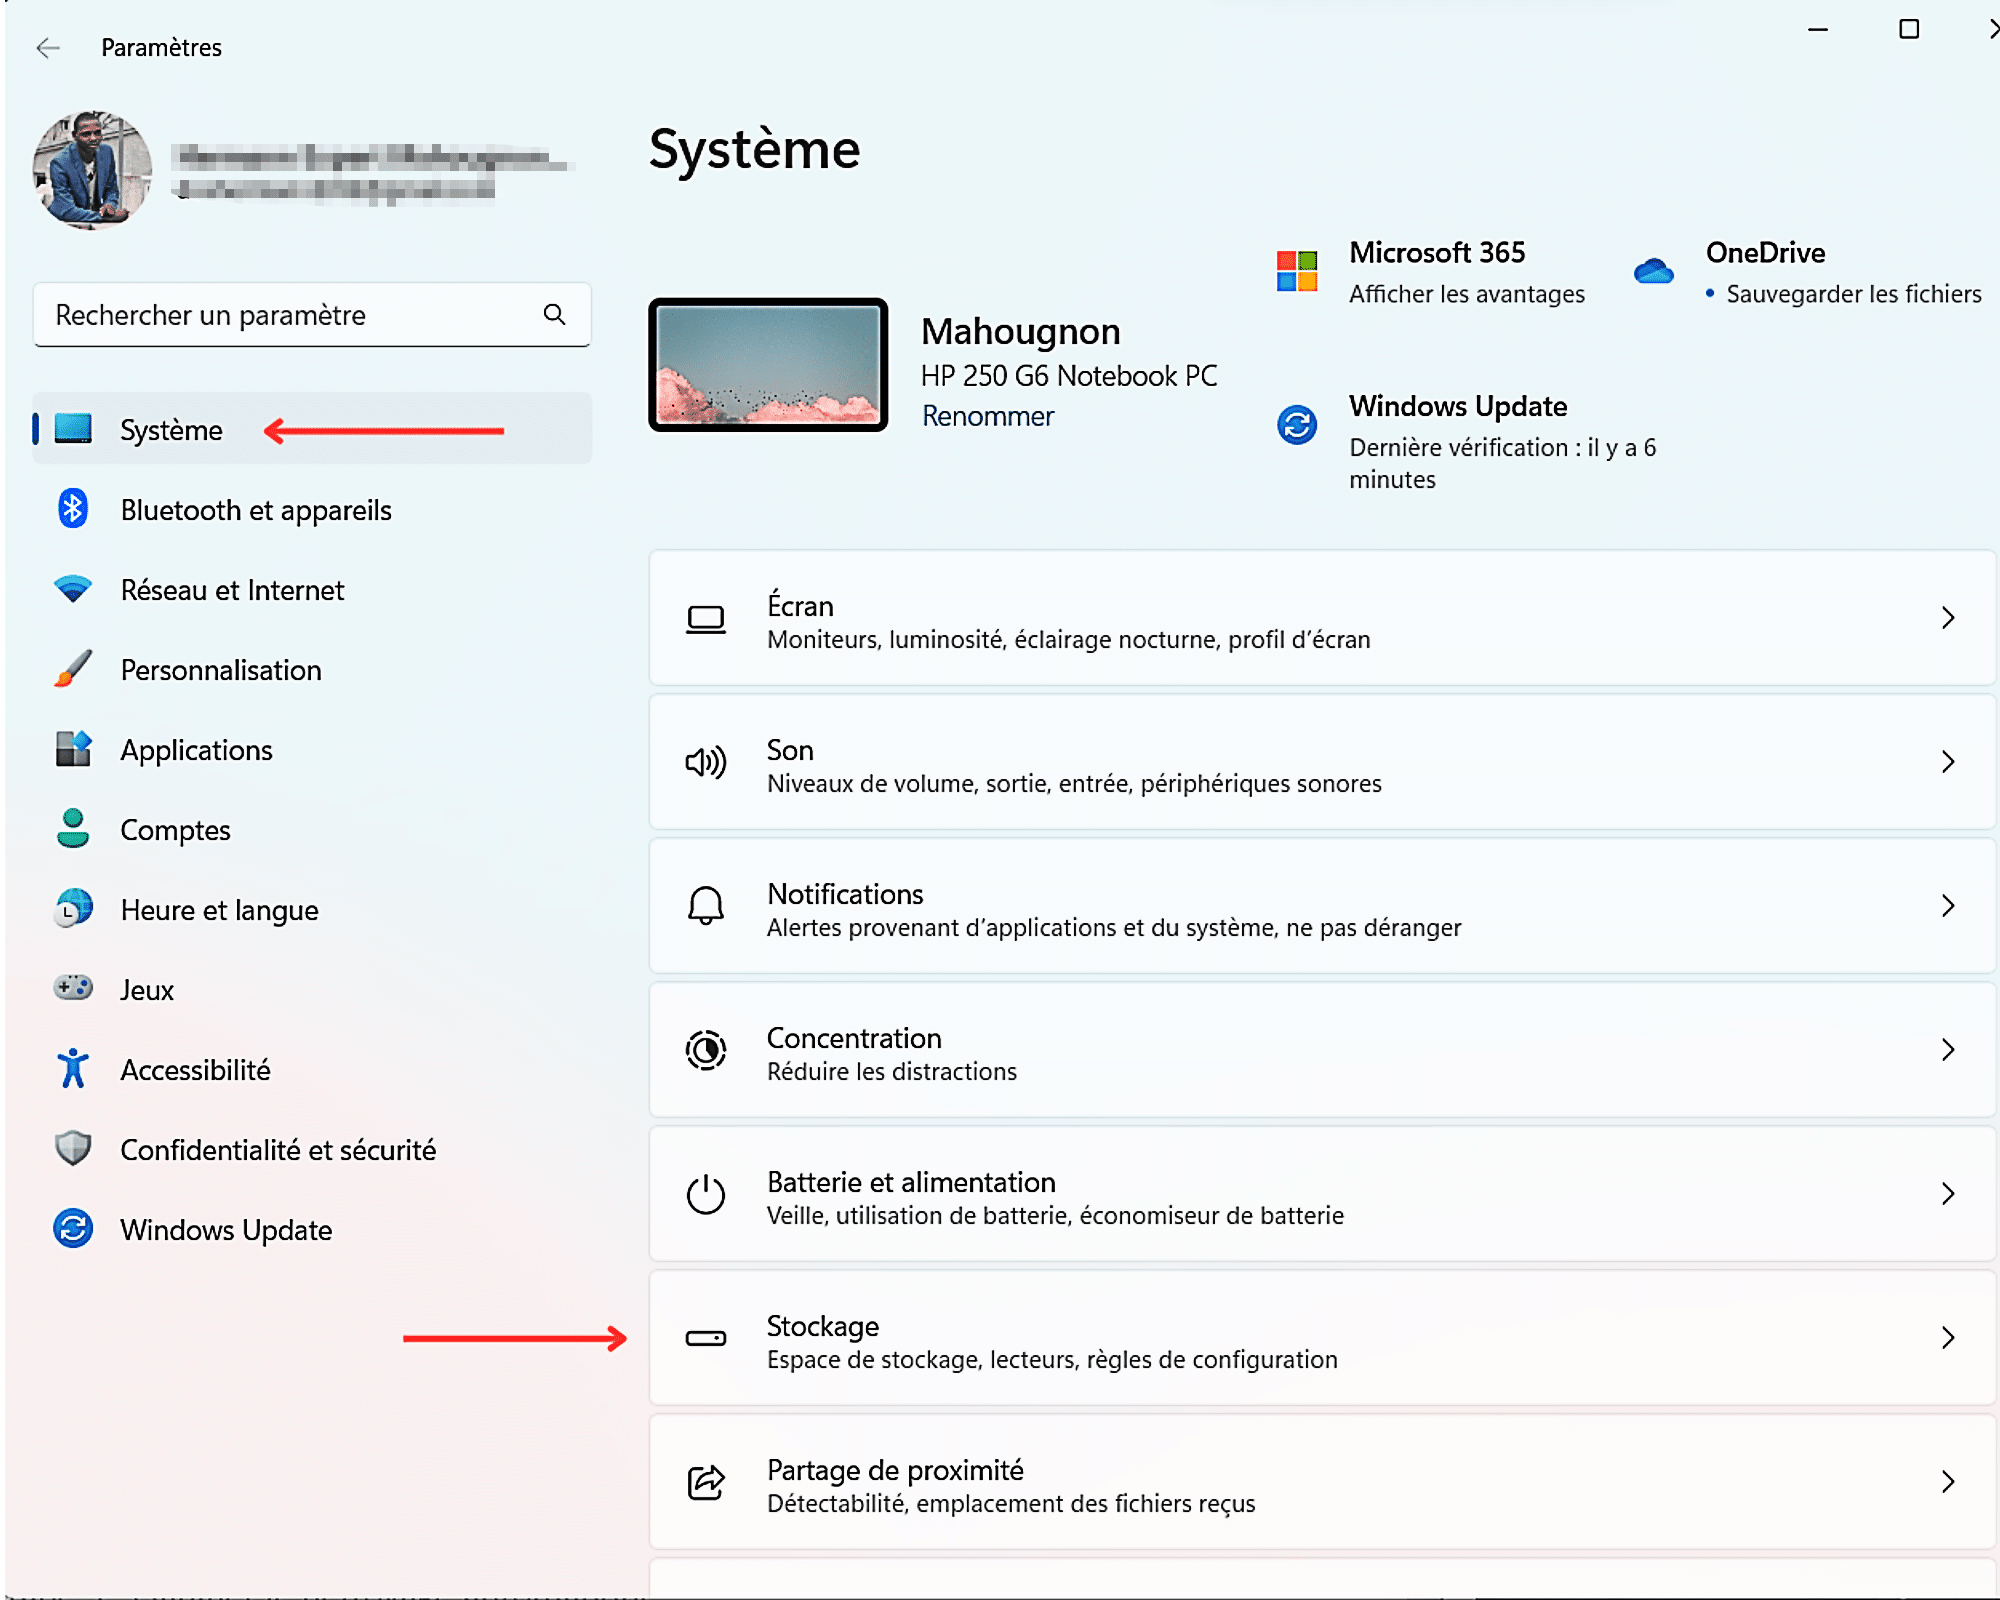
- select section SystemThis is at the top of the list of parameters displayed in the left-hand side column.
- Then browse the list of features presented in the middle column. Finally, click on the function storage“.
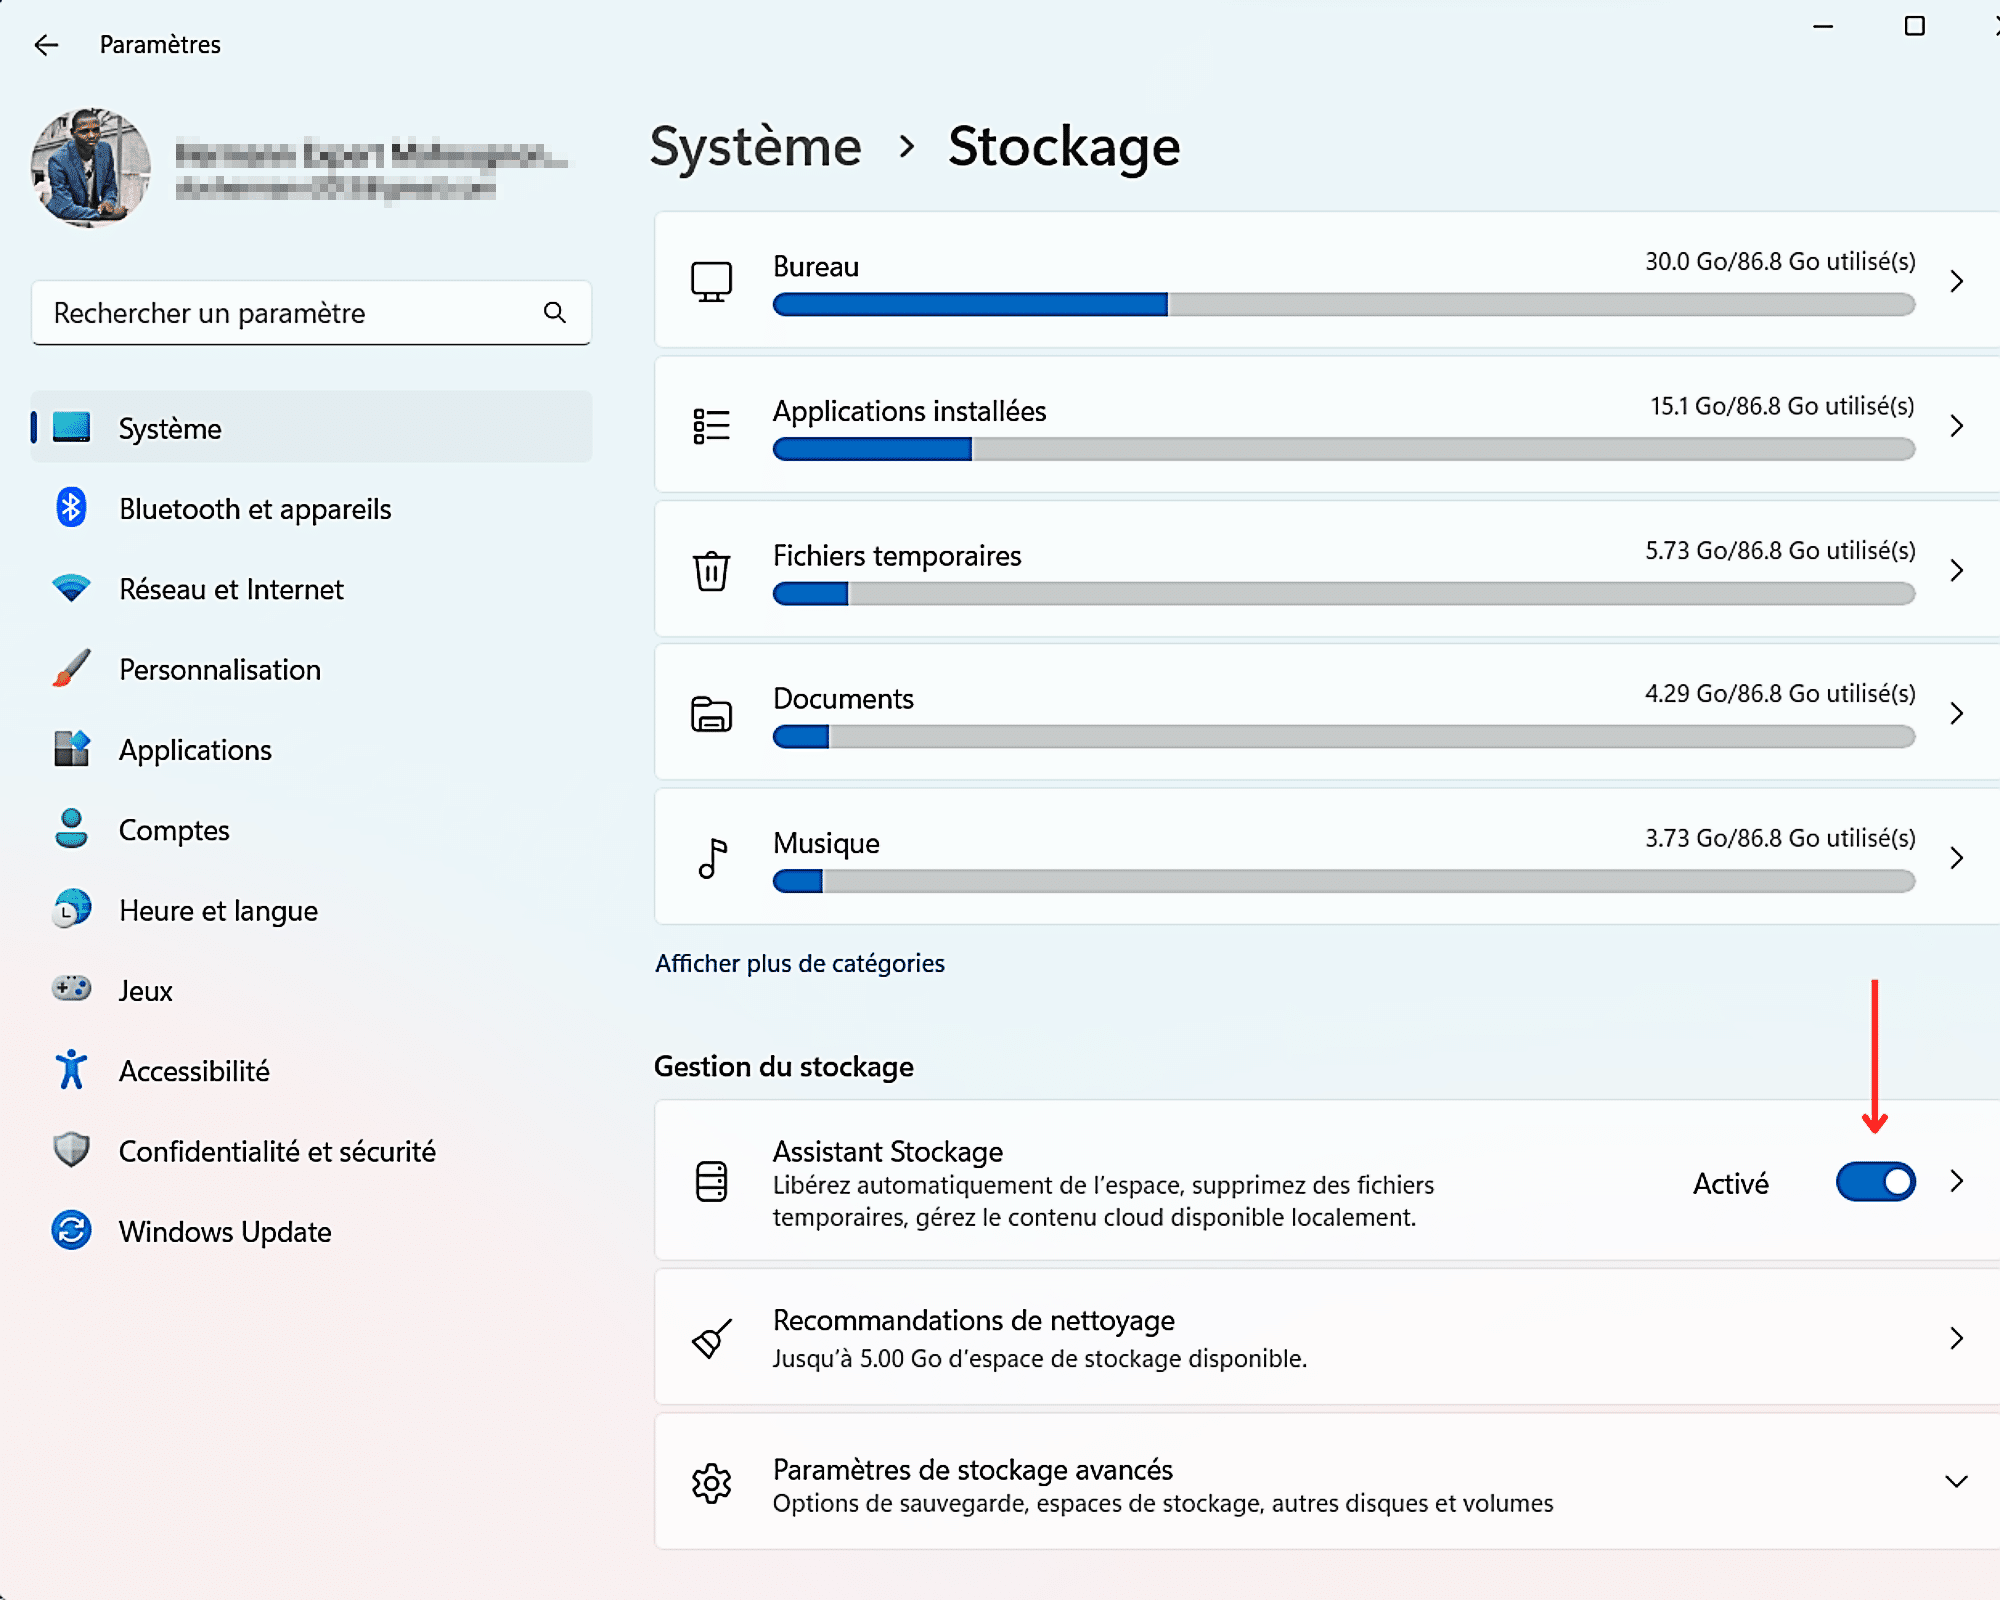
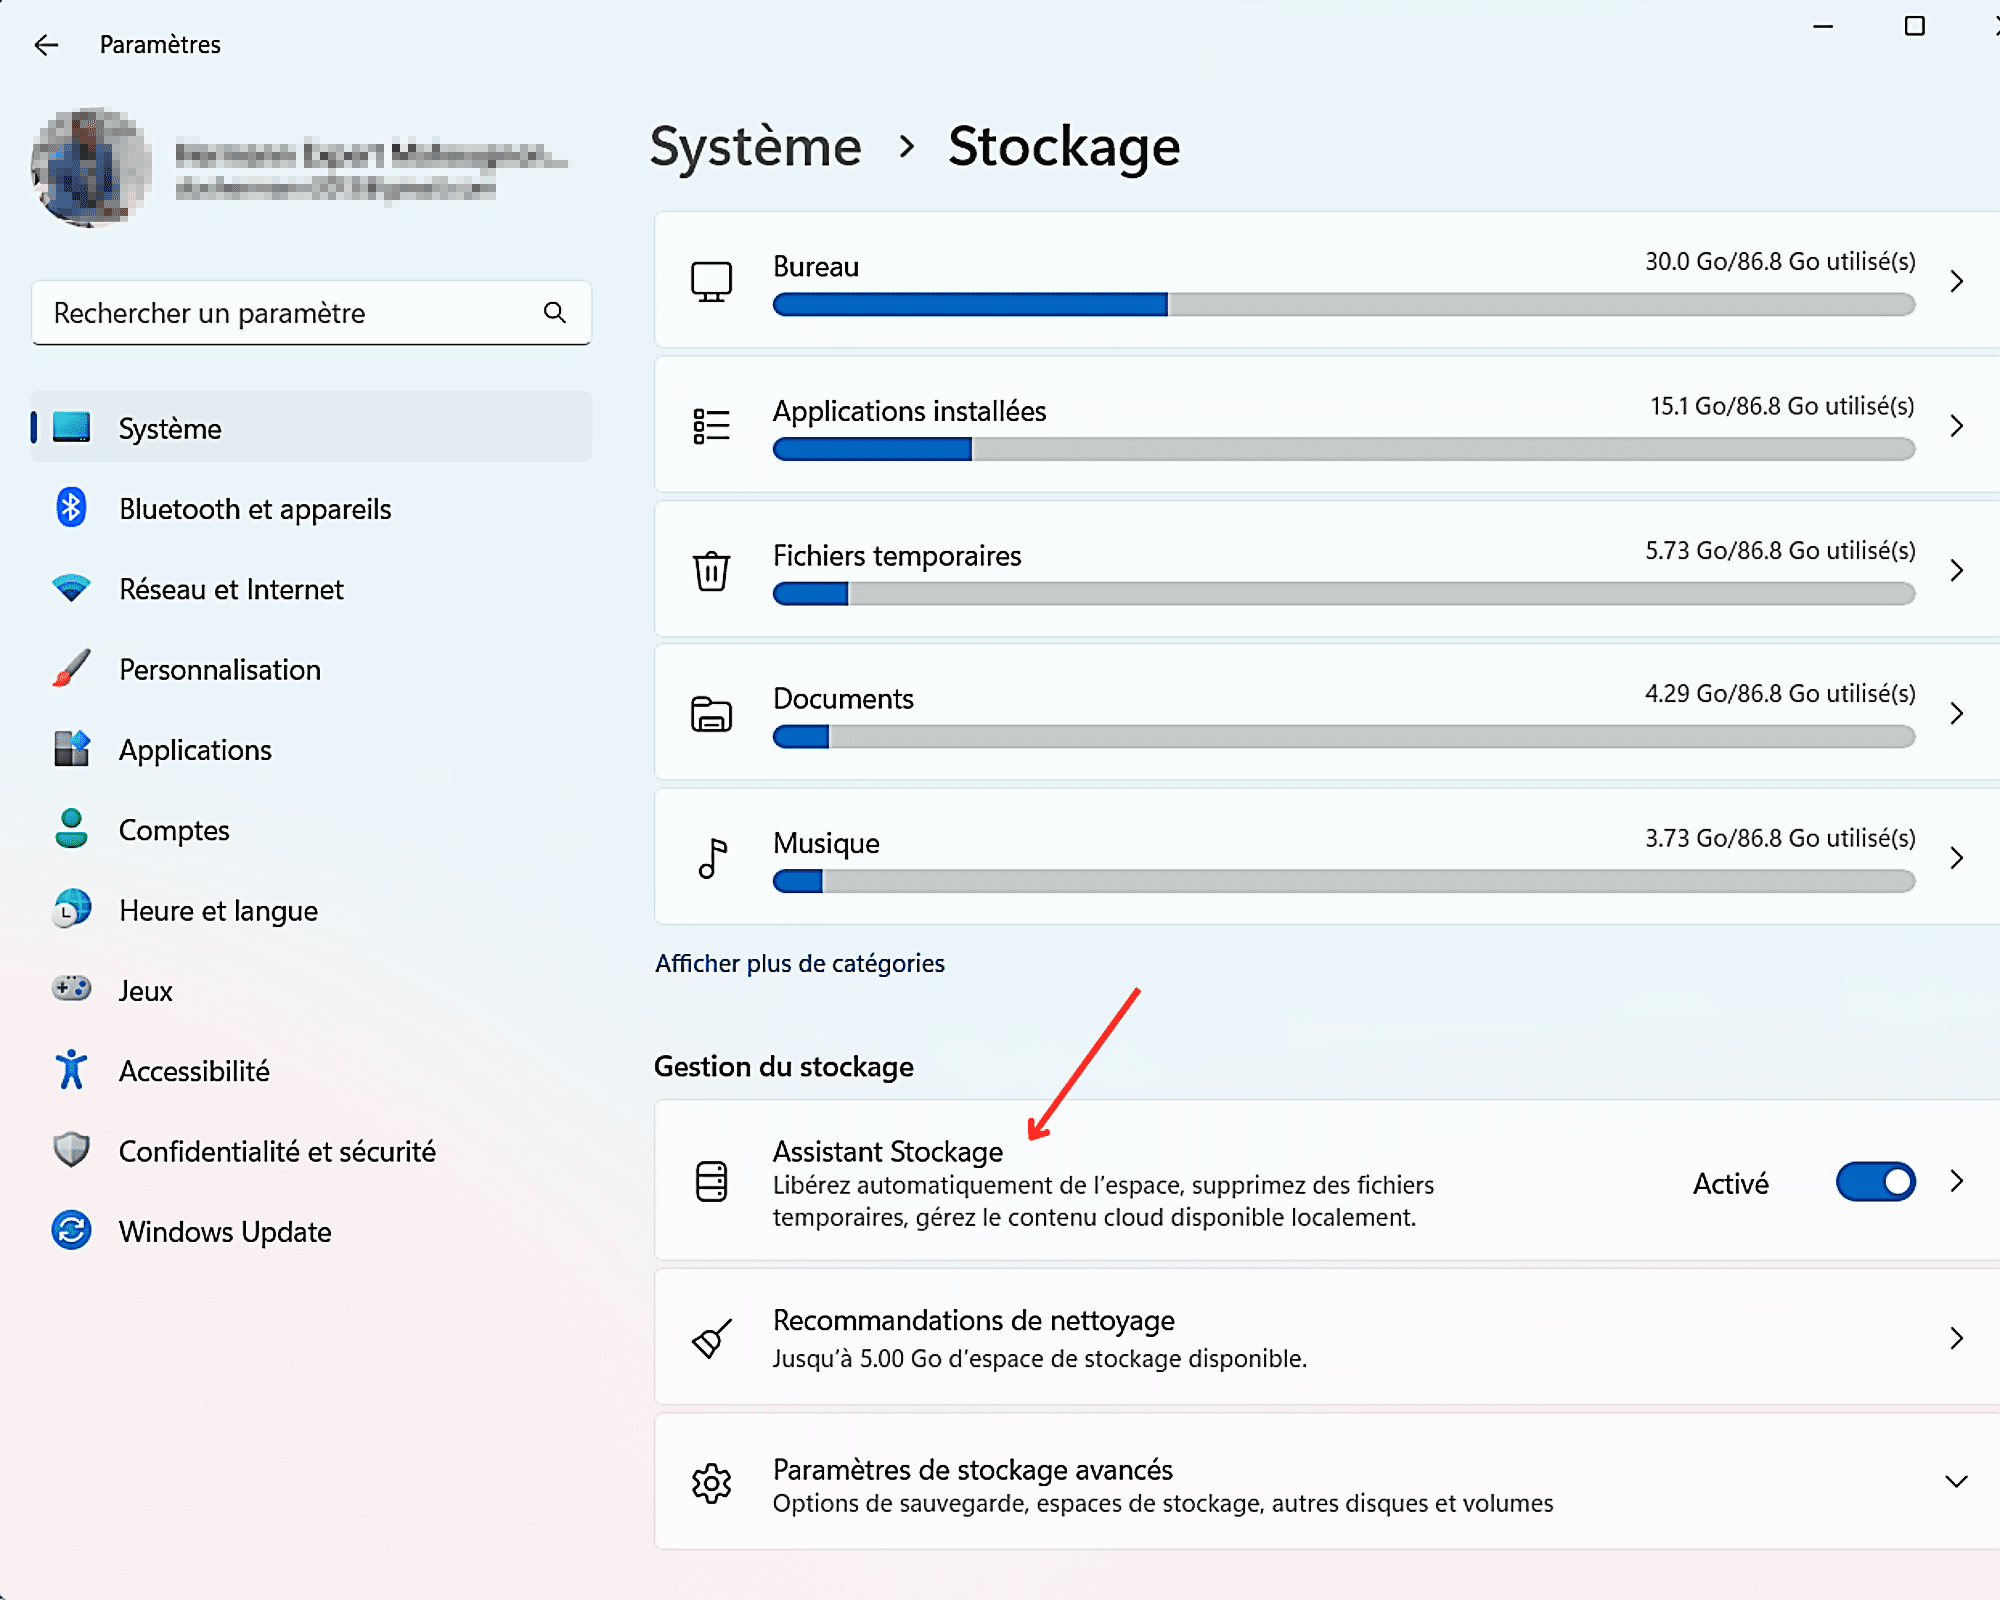
- The Storage settings page should now open. find the tool storage wizardYou will find it in the section “. Storage management Once done, activate it, if it is not already, by flipping the switch associated with it to the right. A left-click on the button should be sufficient to activate it.
Step 3: Schedule automatic cleaning
Unfortunately, all this is not enough to activate Windows 11 Storage Sense. It must also be configured to optimally ensure the automatic cleaning of space on your computer. The good news is that this automatic cleaner is very easy to configure. Here are the steps to follow to schedule automatic cleaning of your computer in Windows 11 using Storage Sense:
Enable automatic cleaning of temporary files on Windows 11
To get started, you must click on the title of the tool to access its parameters. These have several titles.
After that, activate the function ” Clean temporary files From the first address. To do this you will need to check the box associated with the only option available there,” Keep Windows running smoothly by automatically cleaning system files and temporary applications If you have already done so, skip to the next section in this case.
Enable automatic cleaning of user content
To free up space automatically on your Windows 11 PC, the ” Automatic cleaning of user content It must also be enabled. It is usually by default. But if this is not the case, then you will have to activate the switch located in this section.
Configure cleaning schedules
Once you have completed the above steps, you can start planning to clean up your computer space. You should know that Windows 11 usually turns on Storage Sense once its computers run out of hard drive space.
But the way this tool works can be modified. In fact, you can configure the assistant to automatically clean up space on a more regular basis. This will then allow you to prevent any saturation of your computer’s hard drive. To achieve this, follow these steps:
- Click in the field below the heading ” Turn on the storage sensorNext, select from the drop-down list that appears the cleaning frequency that suits you best. You will have the choice between everyday “,” Weekly ” And ” Per month “.
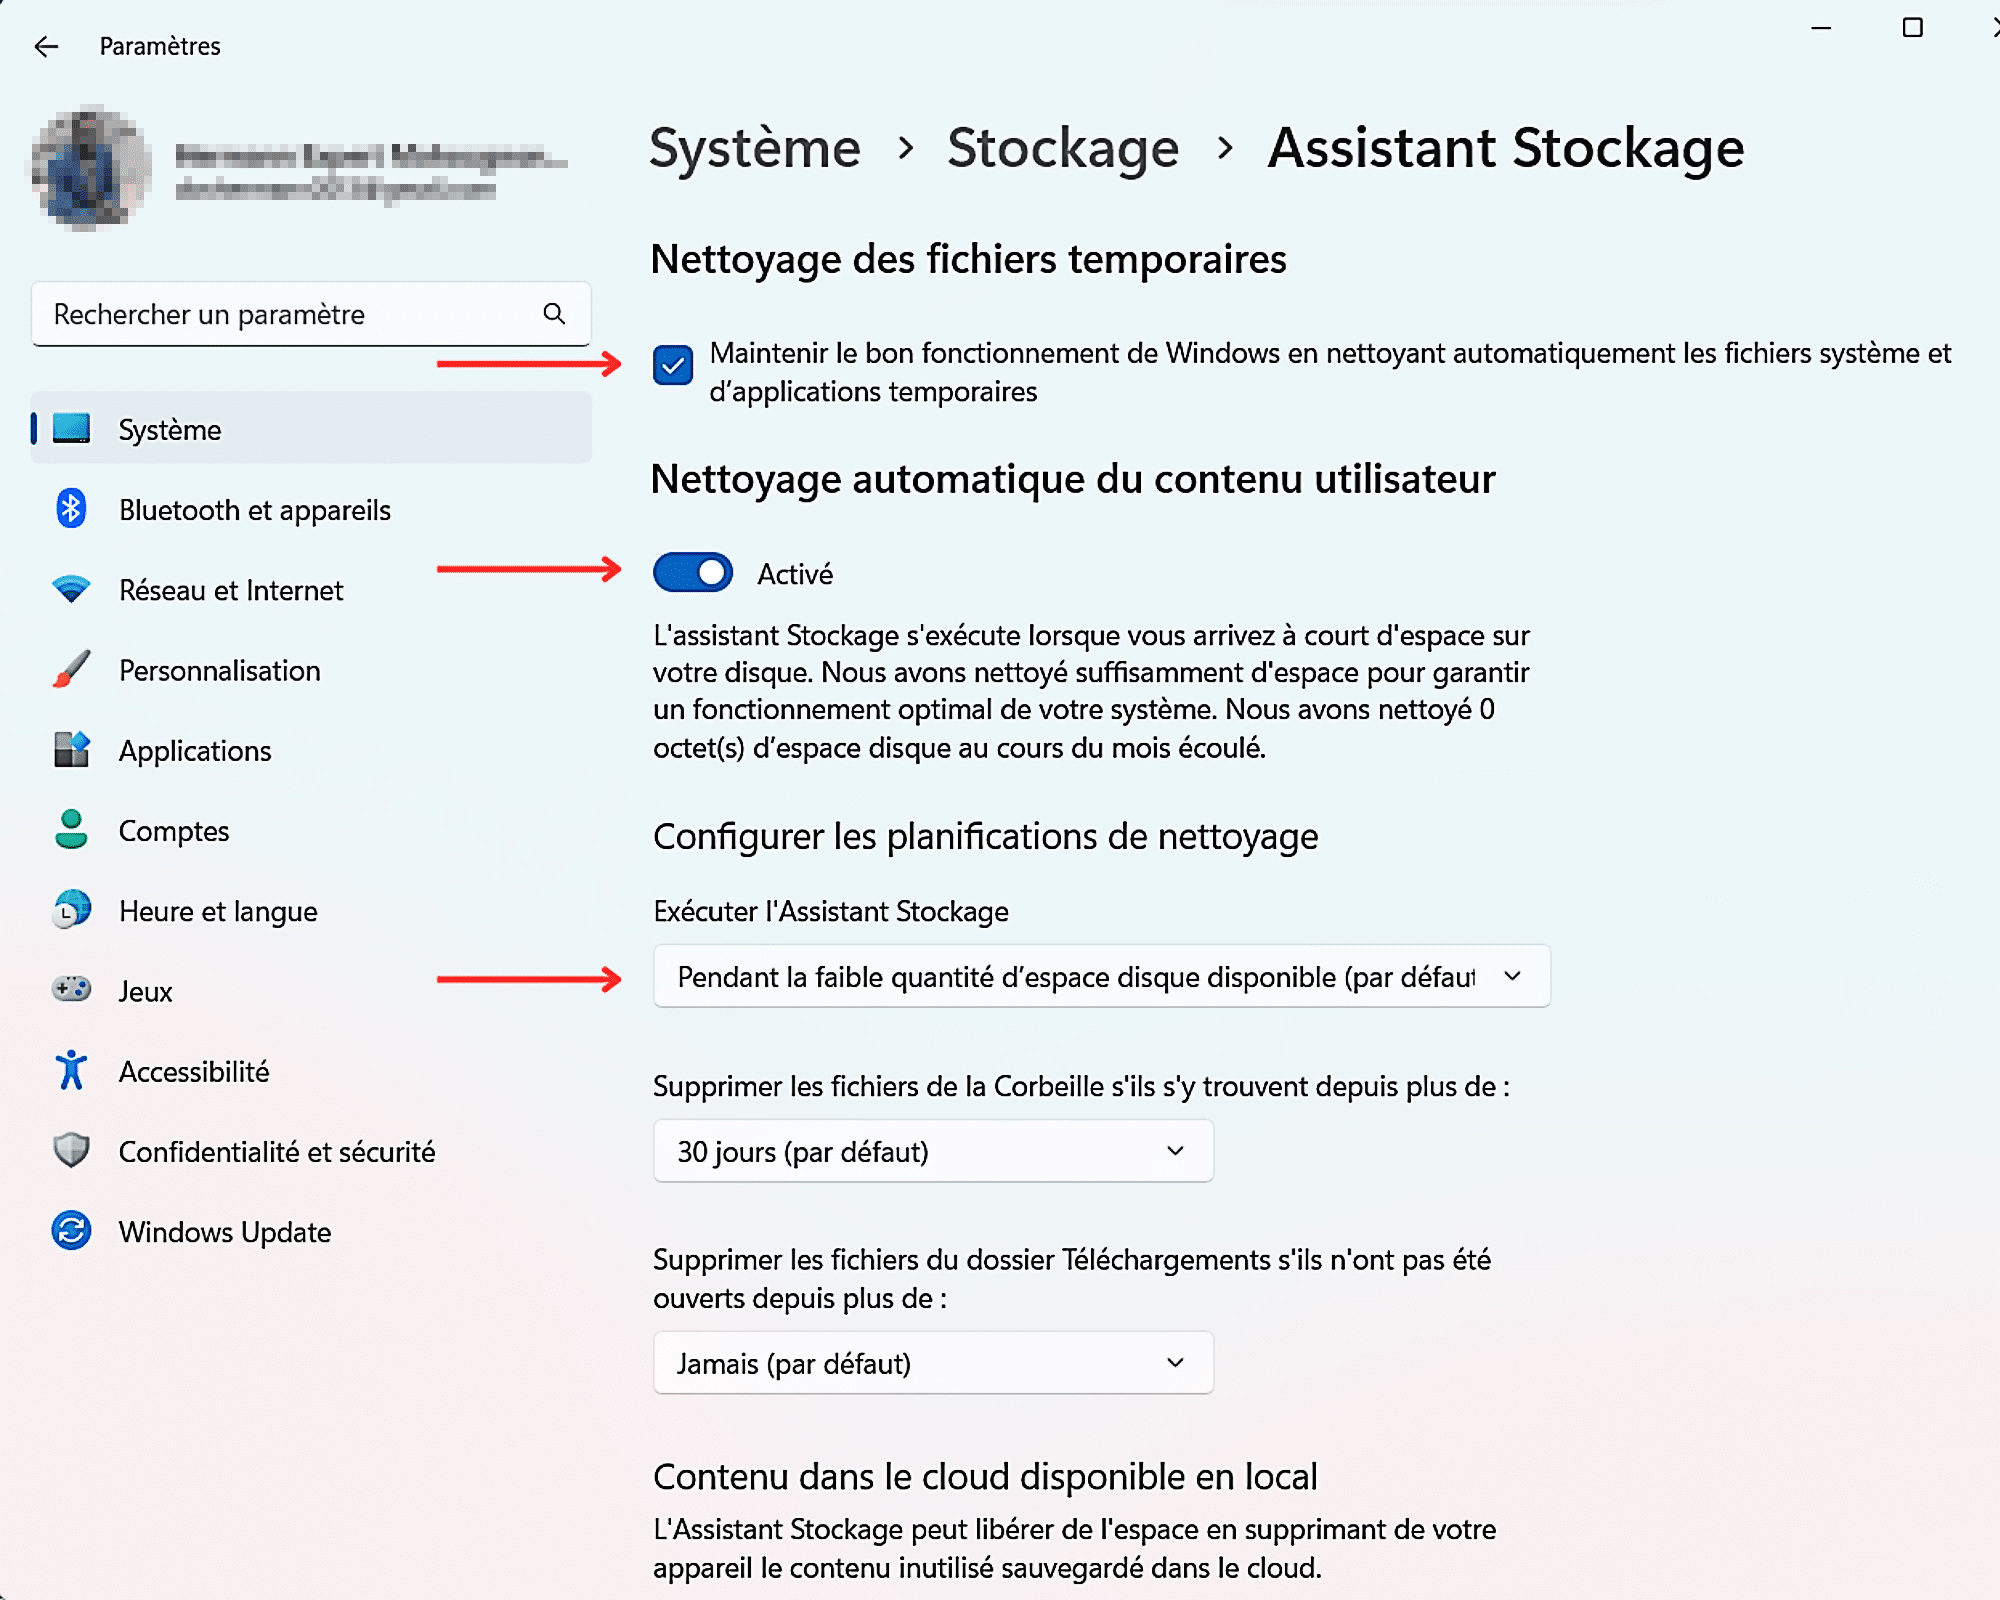
- Follow the same path to set how often Storage Sense should empty the Recycle Bin. Here too, you will have different possibilities: 30 days (default)“,” 14 days or Day 1 “.
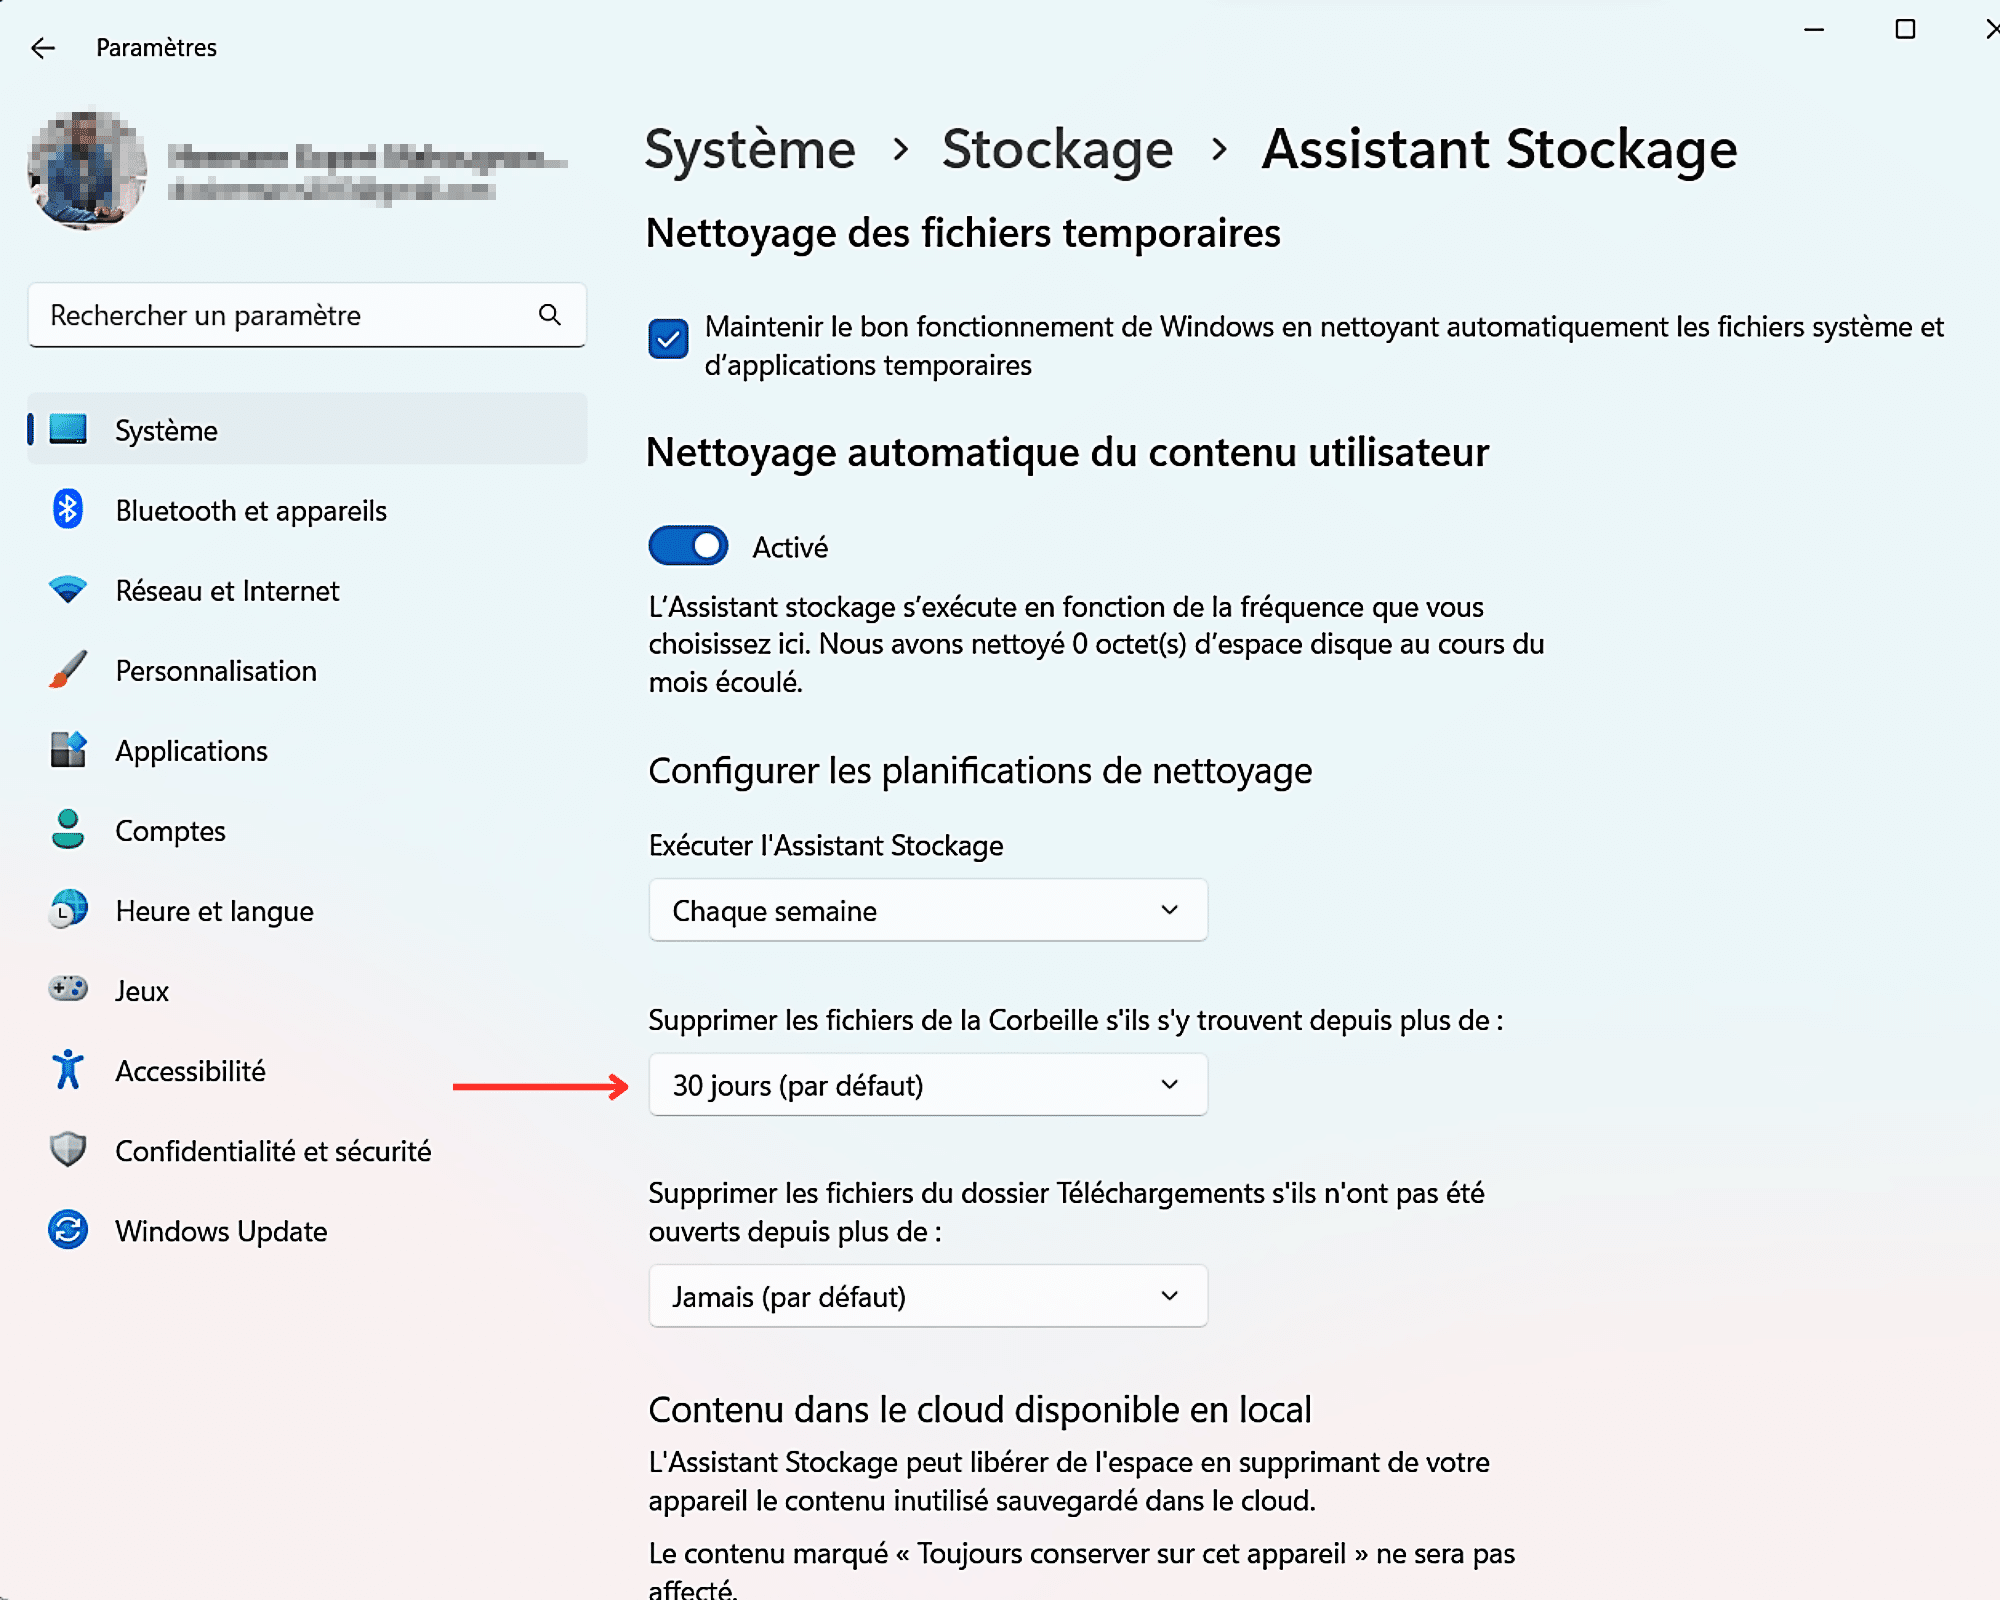
- Finally, you can also let Storage Sense clean up the files in the ” downloads” after a while. Because often many large files are stored there unnecessarily when they are not needed. To reclaim this space, you can choose ” Delete the files from the Downloads folder if they haven’t been opened for a while It could be this time 60 days “,” 30 days “,” 14 days or Day 1 To do this, click never (default) This is located directly below the relevant post. Then make your selection.
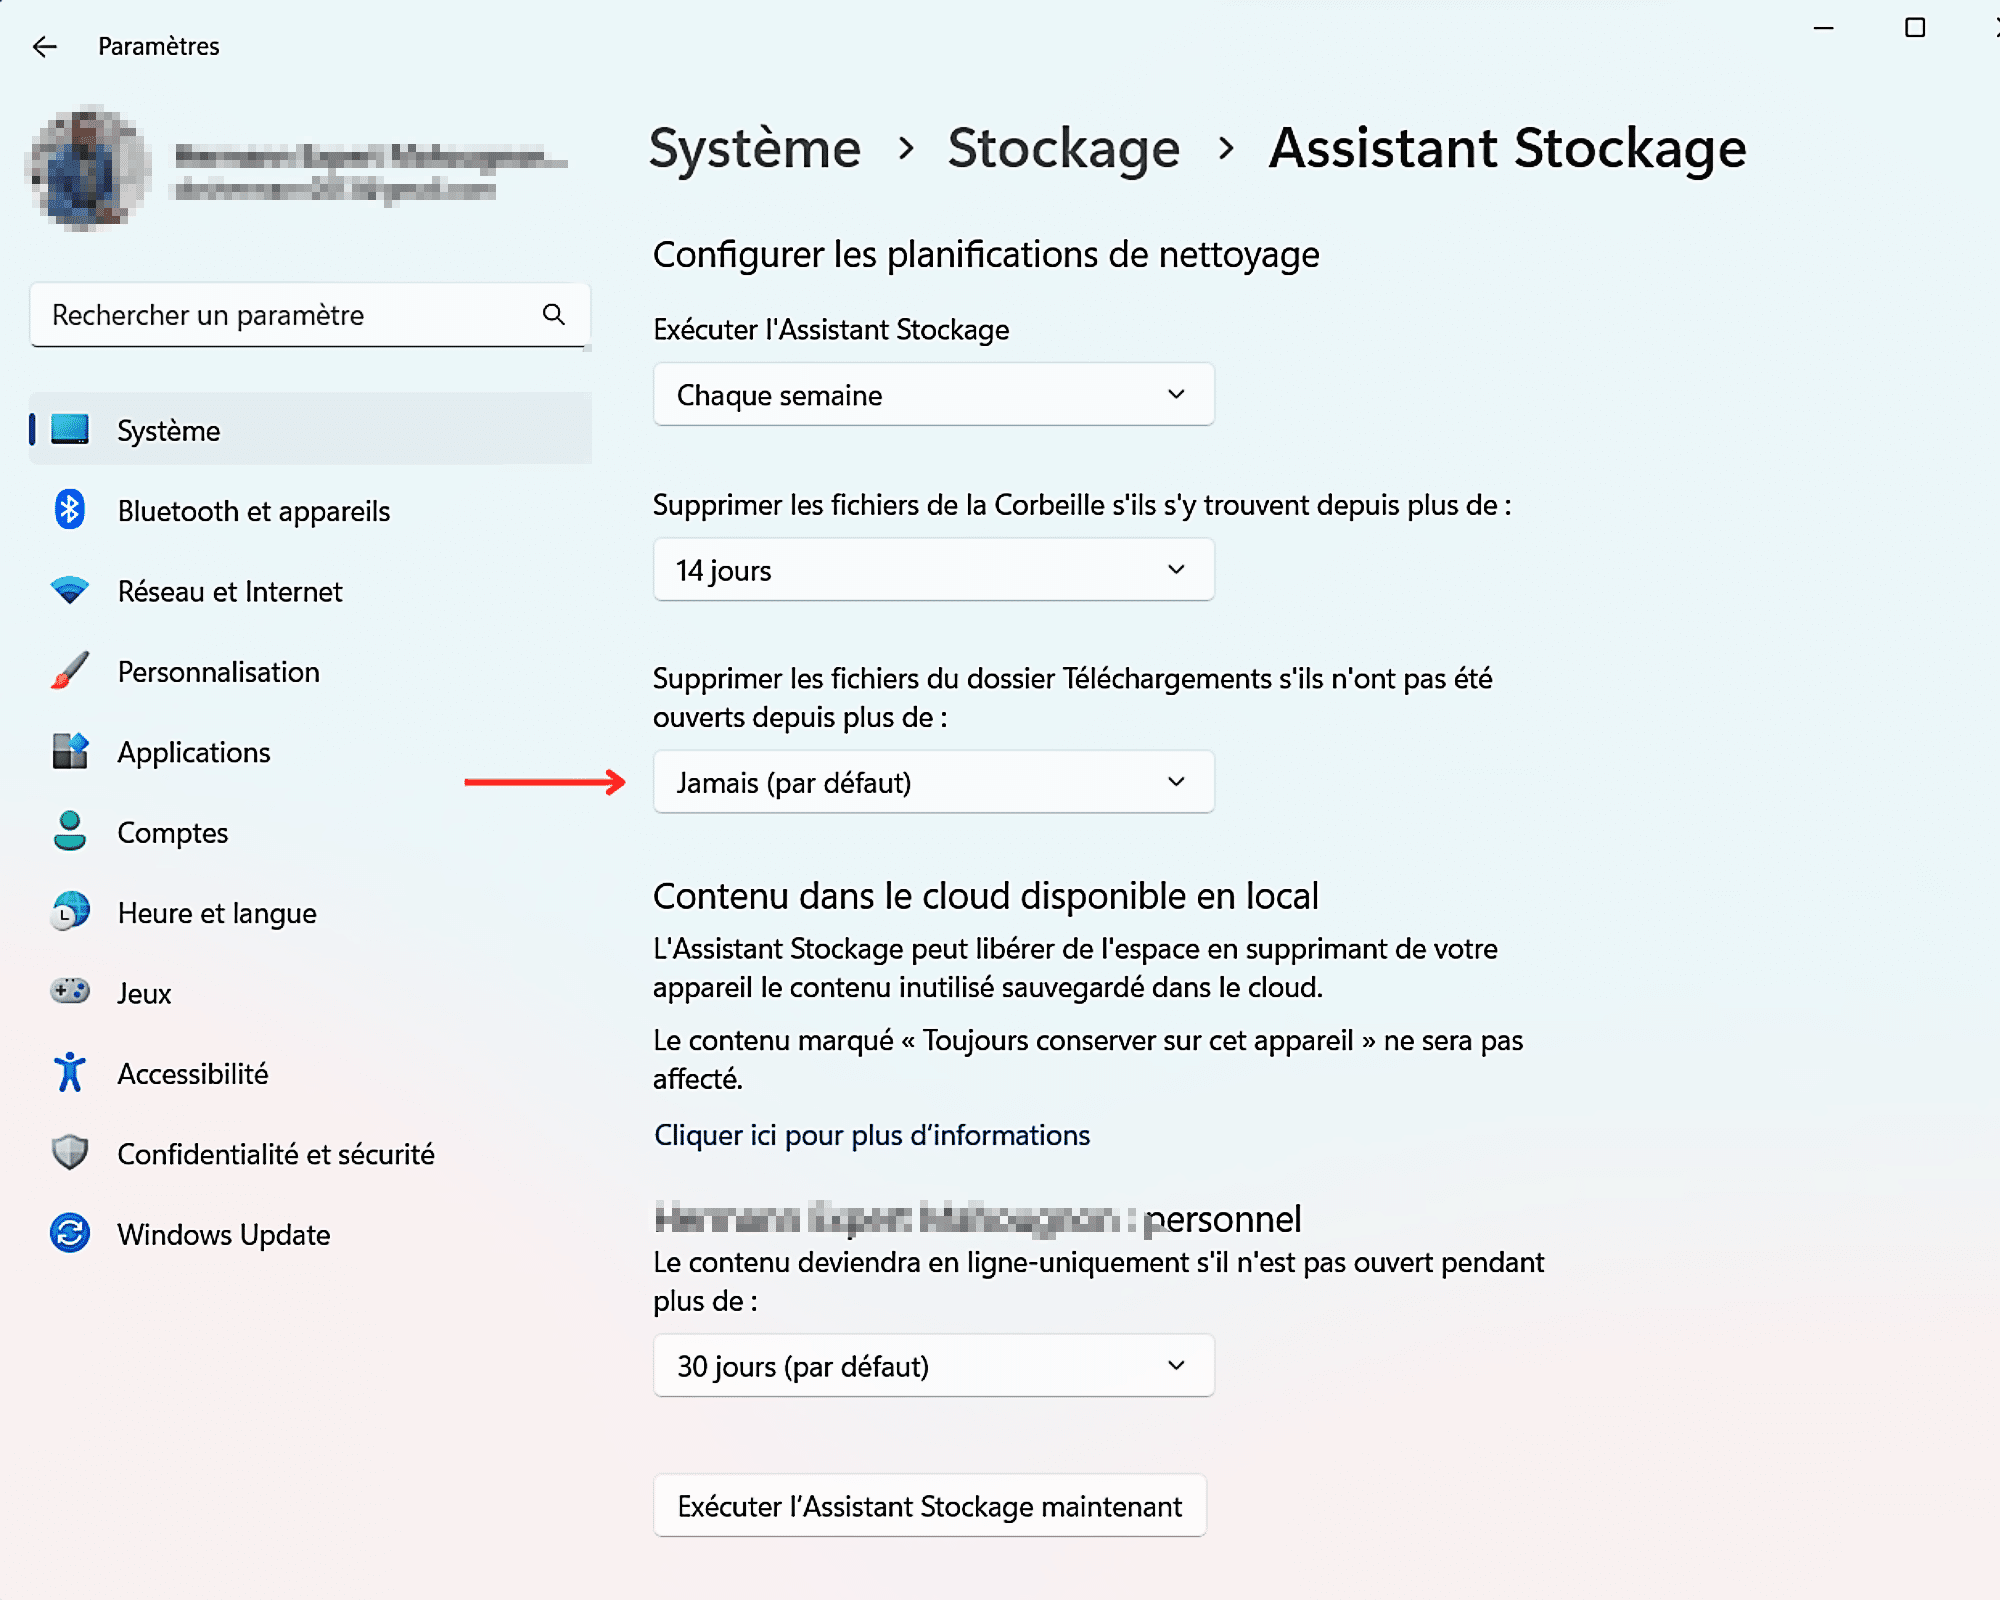
Step 4: Enable automatic deletion of unused content on your computer and save it to the cloud
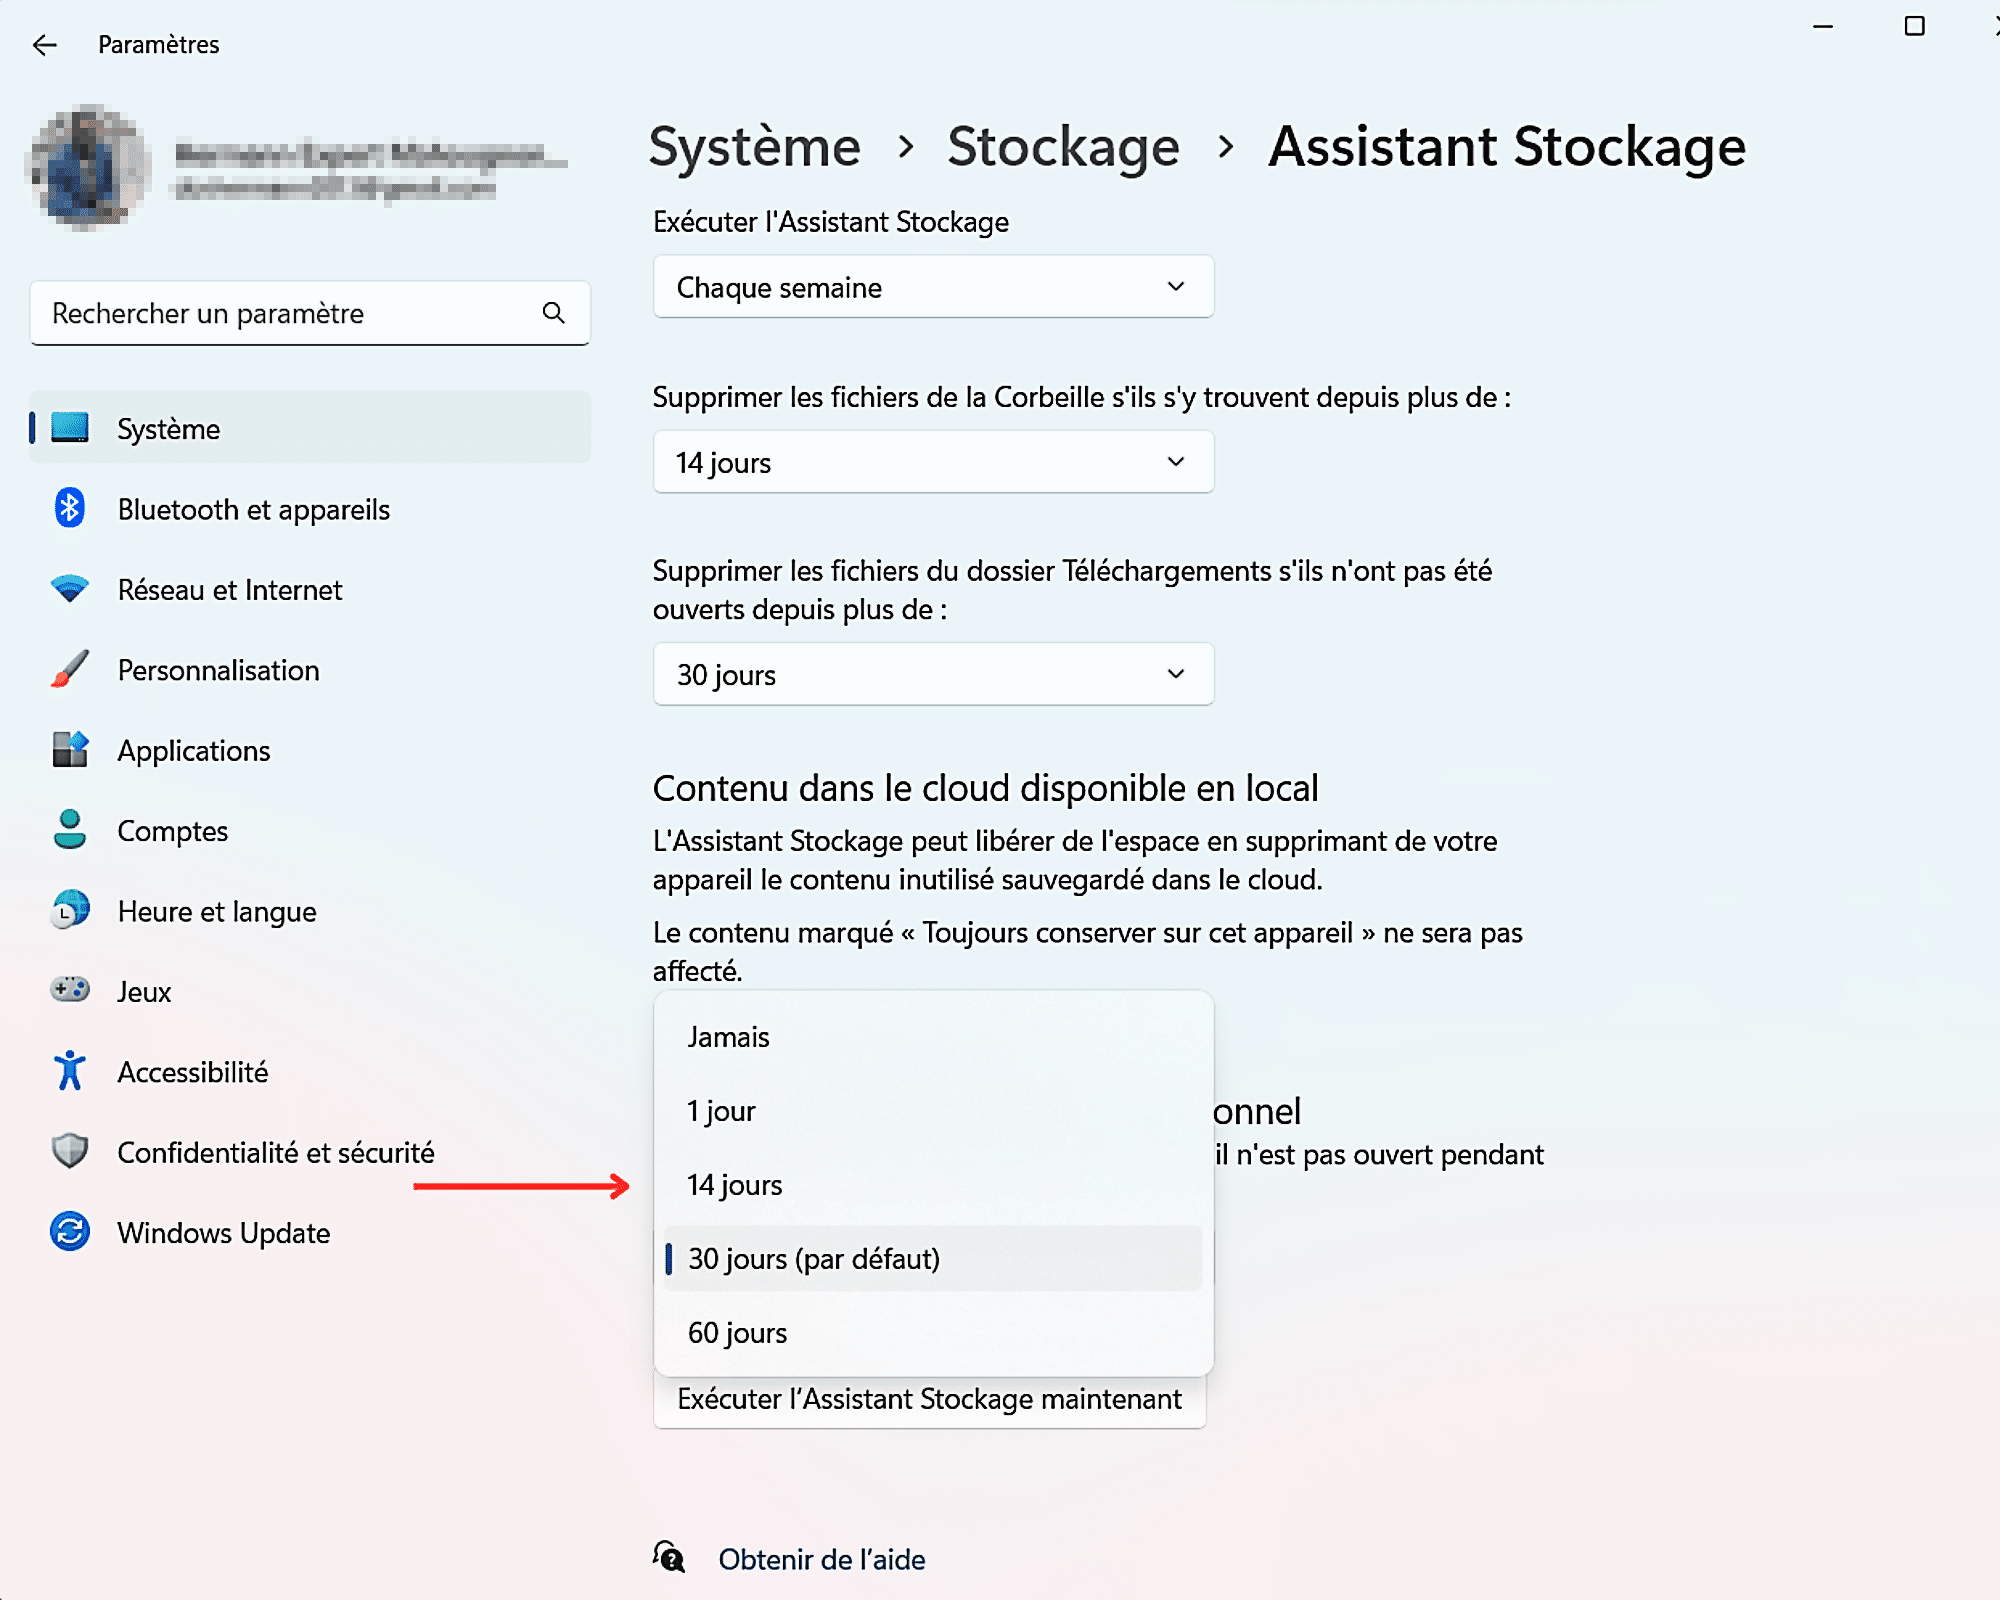
This is the last step. And again, you can configure Storage Sense to clear you of files that are backed up in the cloud and available locally. To activate it, first go to ” Cloud content is available locally “.
Then left-click in each of the fields associated with it. This is to set the rate at which files will be uploaded and deleted locally. The default duration is 30 days, but you can change it as per your convenience. To do this, click in the first field, ” 30 days (default) “.
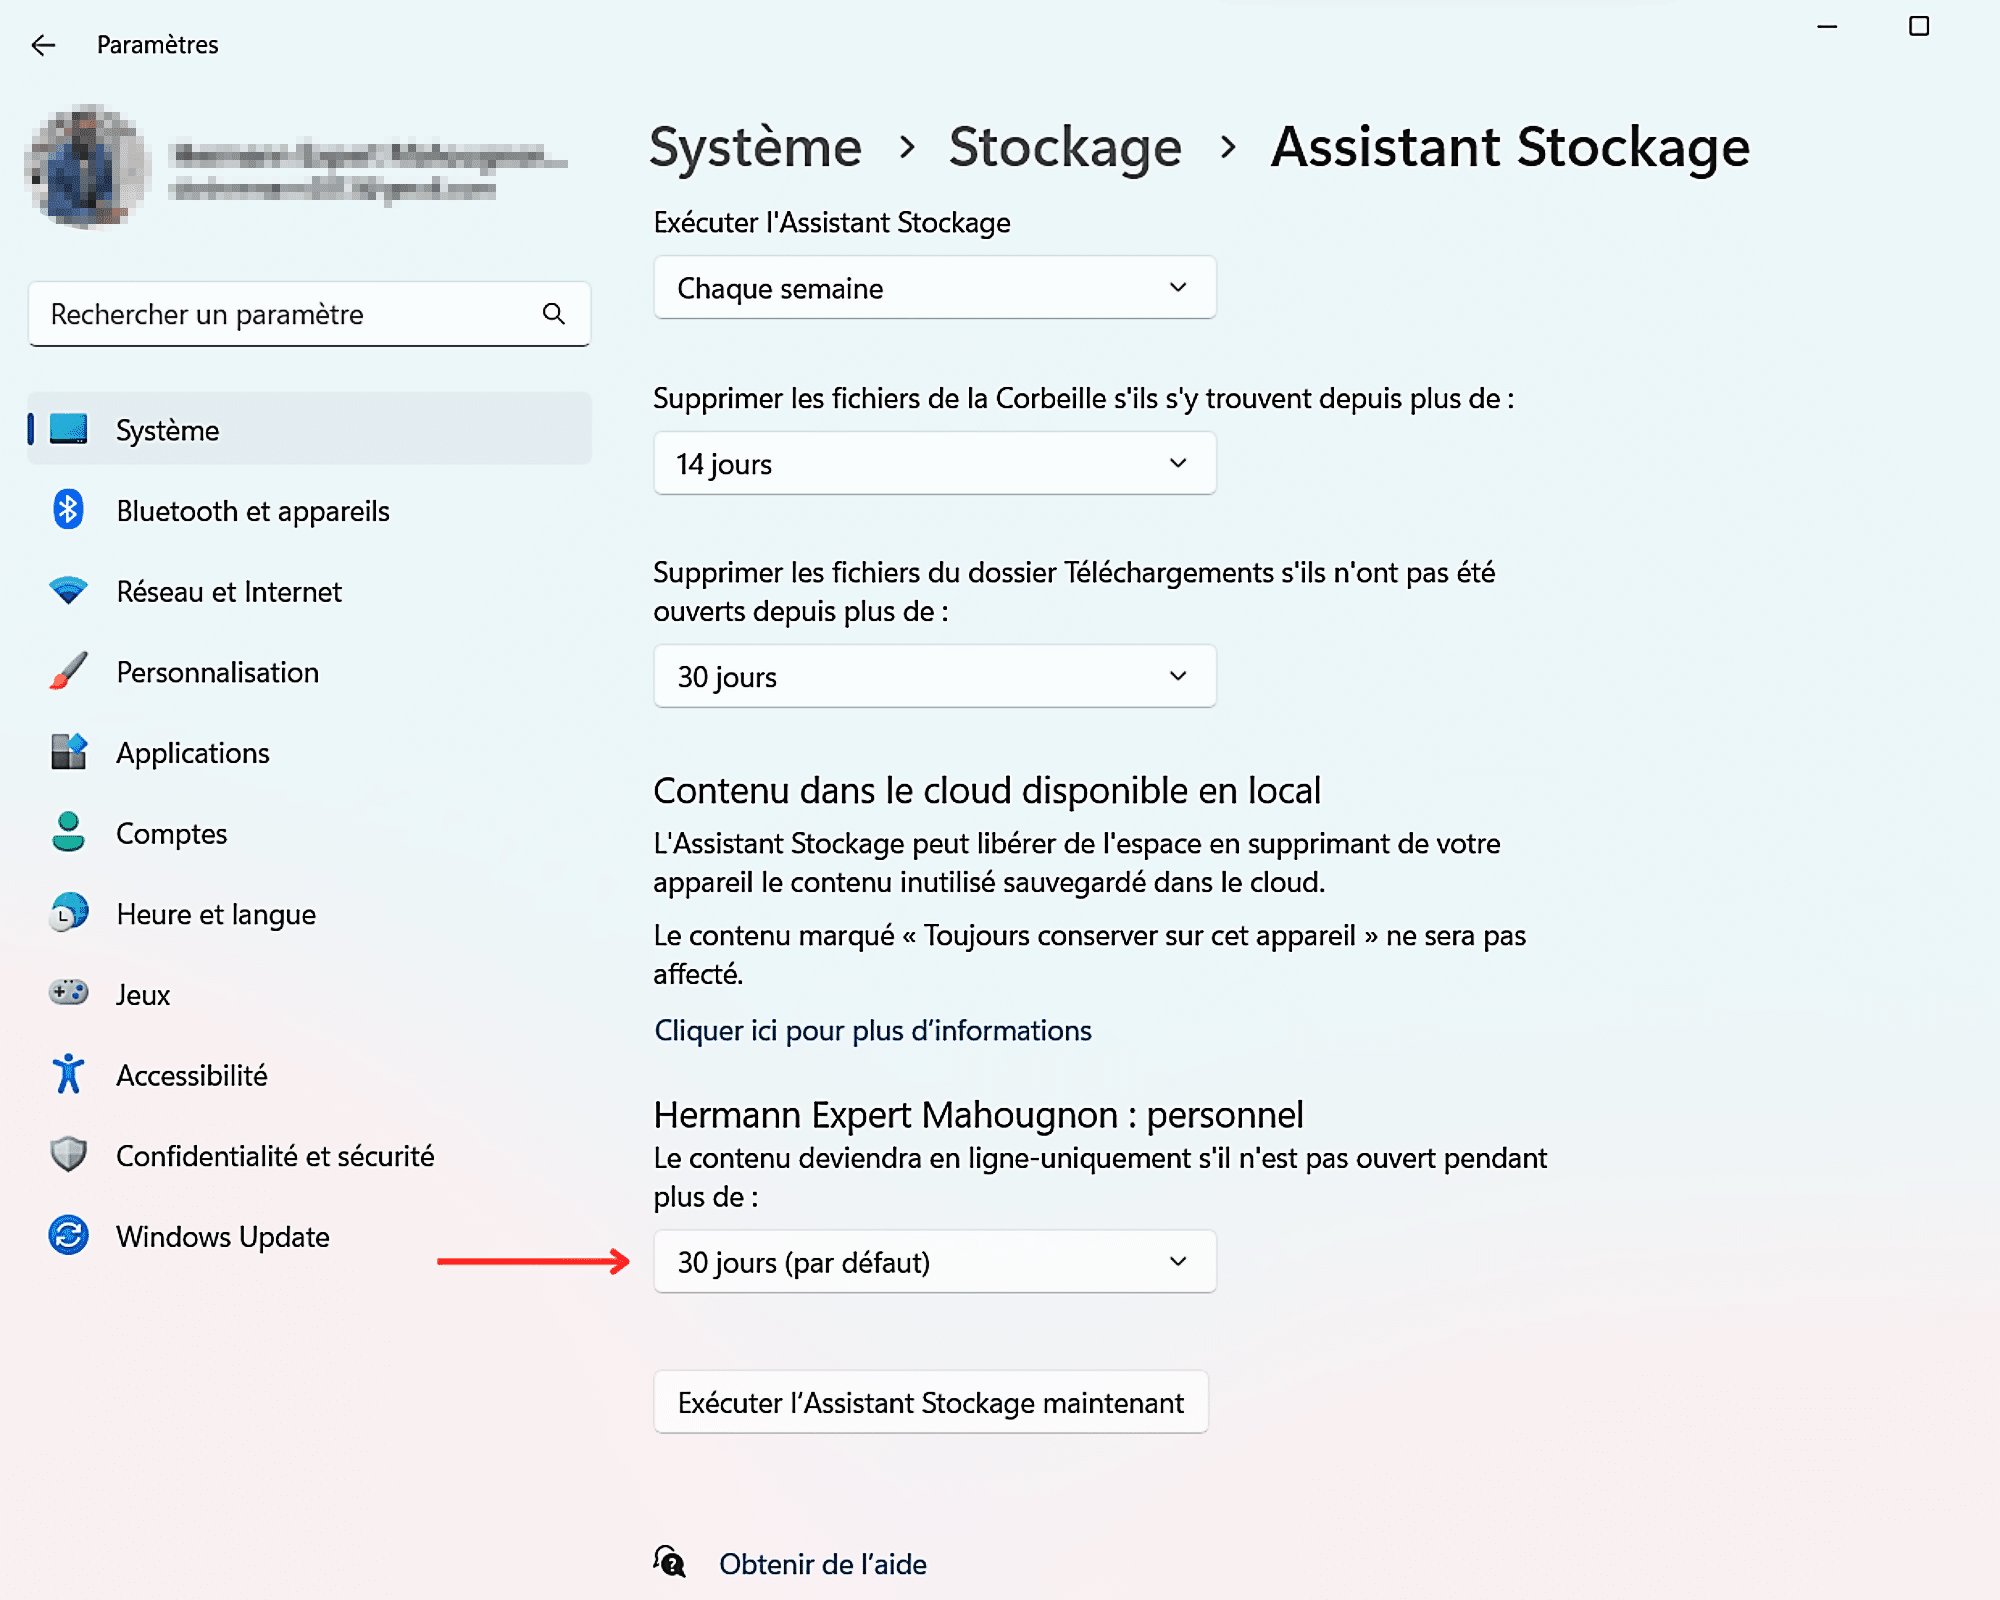
Then choose the frequency that suits you best. You can choose the periodic deletion of ” Day 1 “,” 14 days “,” 30 days or 60 days “.
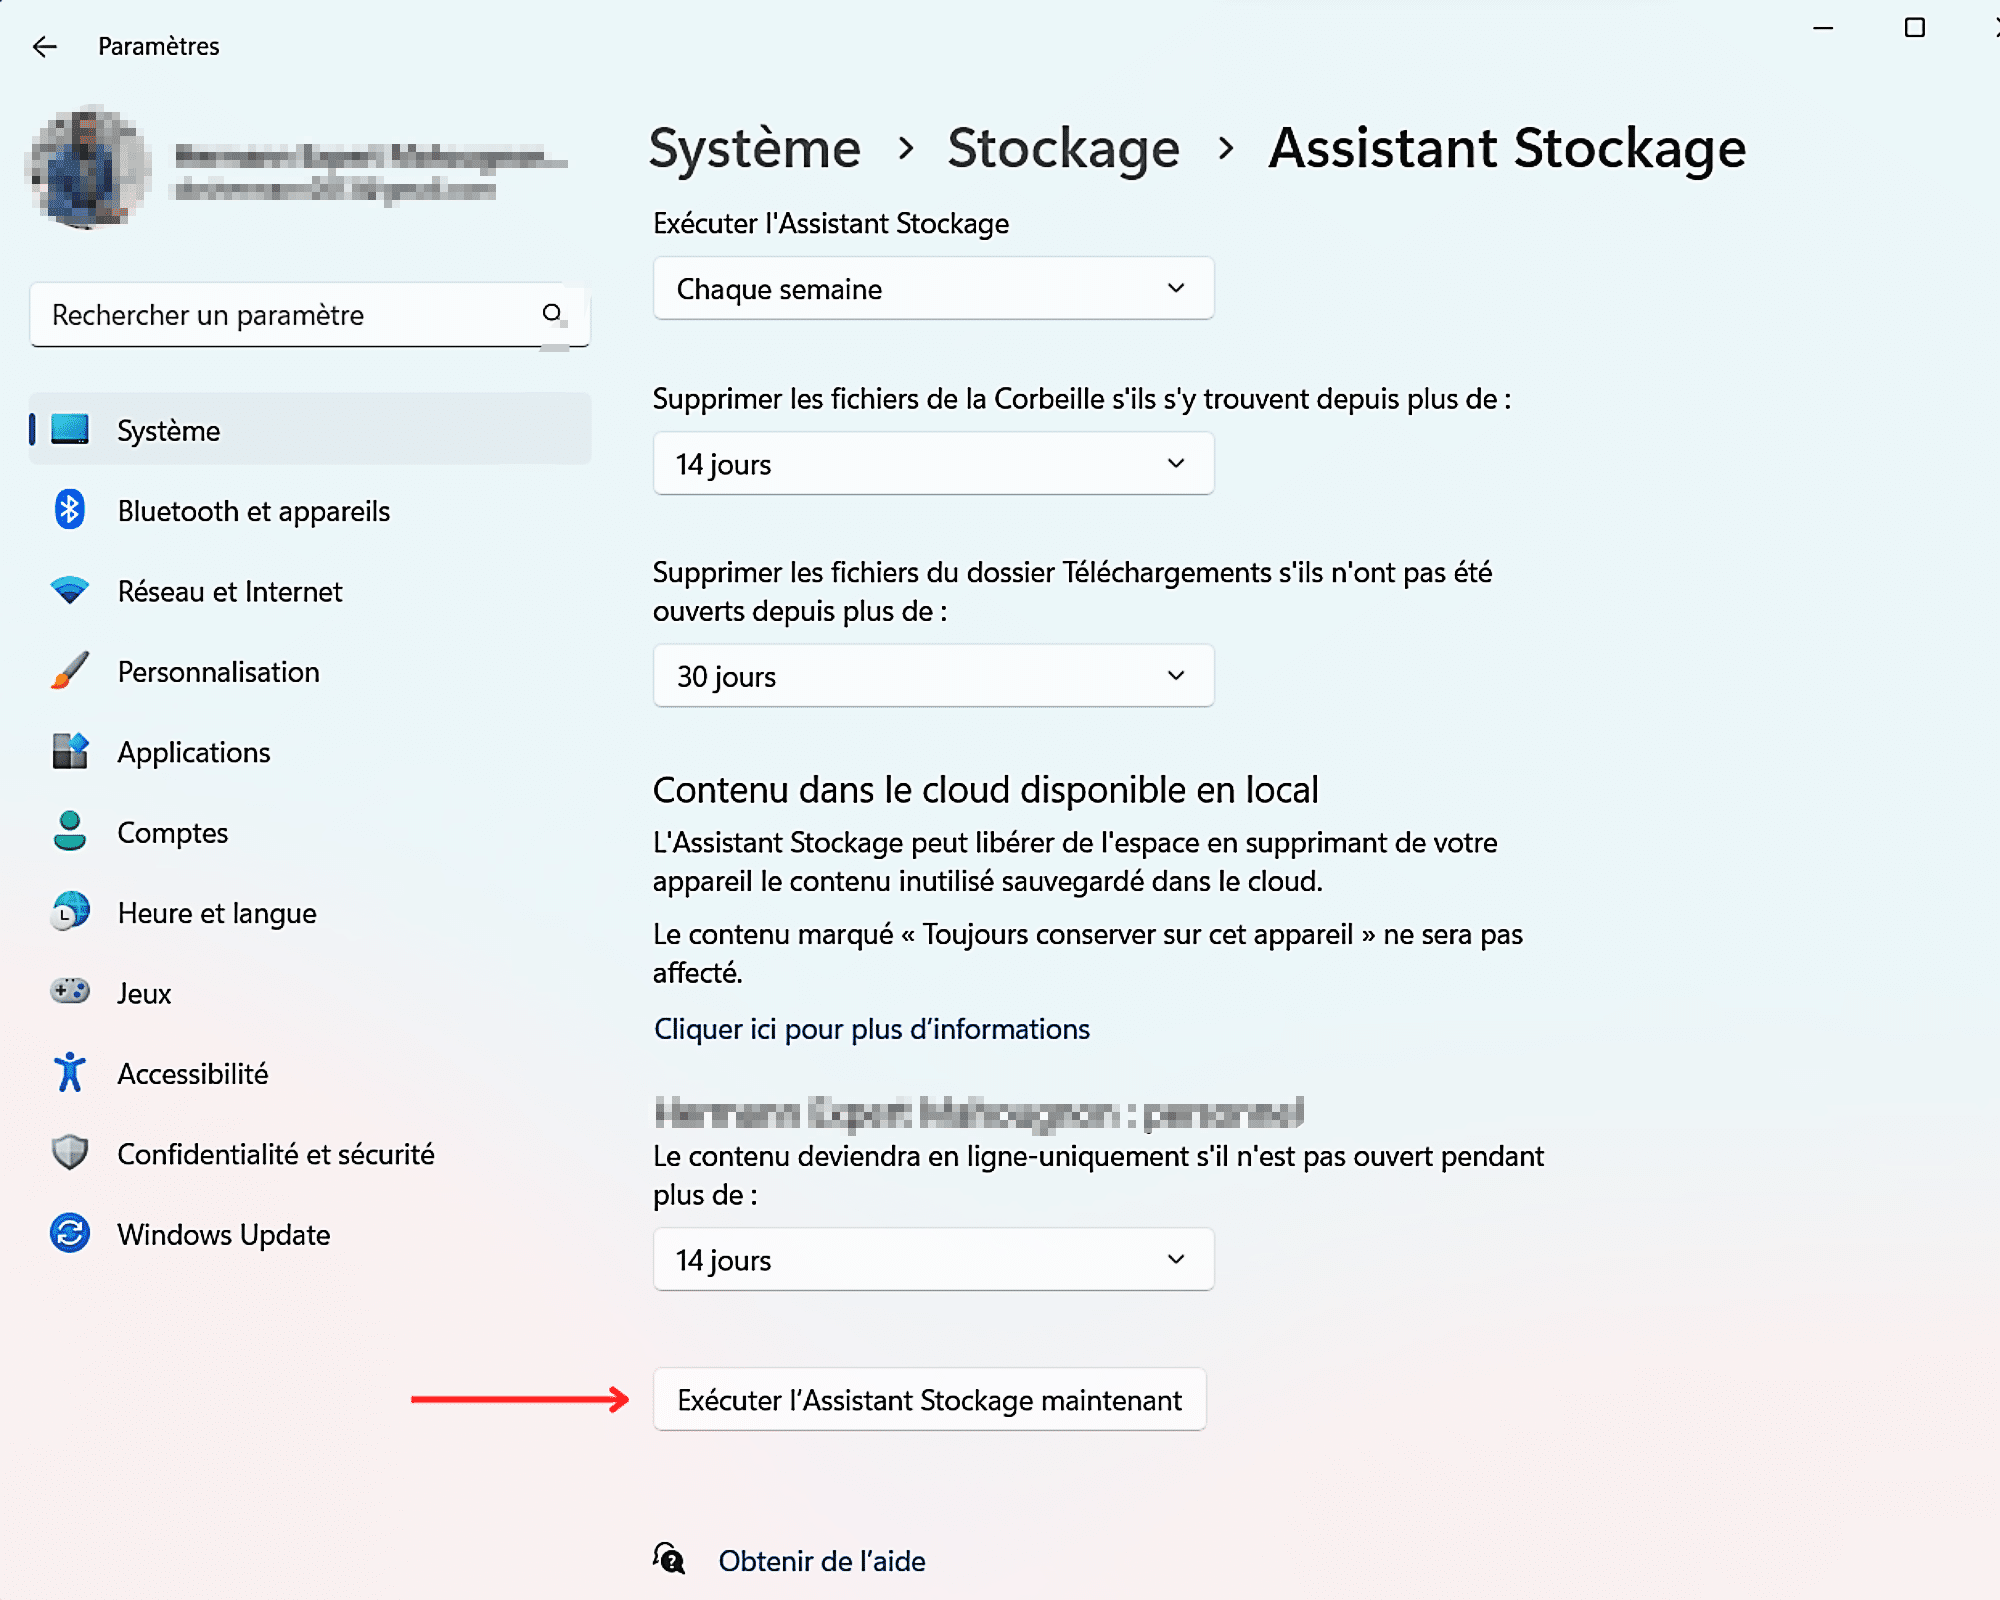
Finally, complete the configuration by clicking on “ Turn on Storage Sense now To clean your computer instantly.

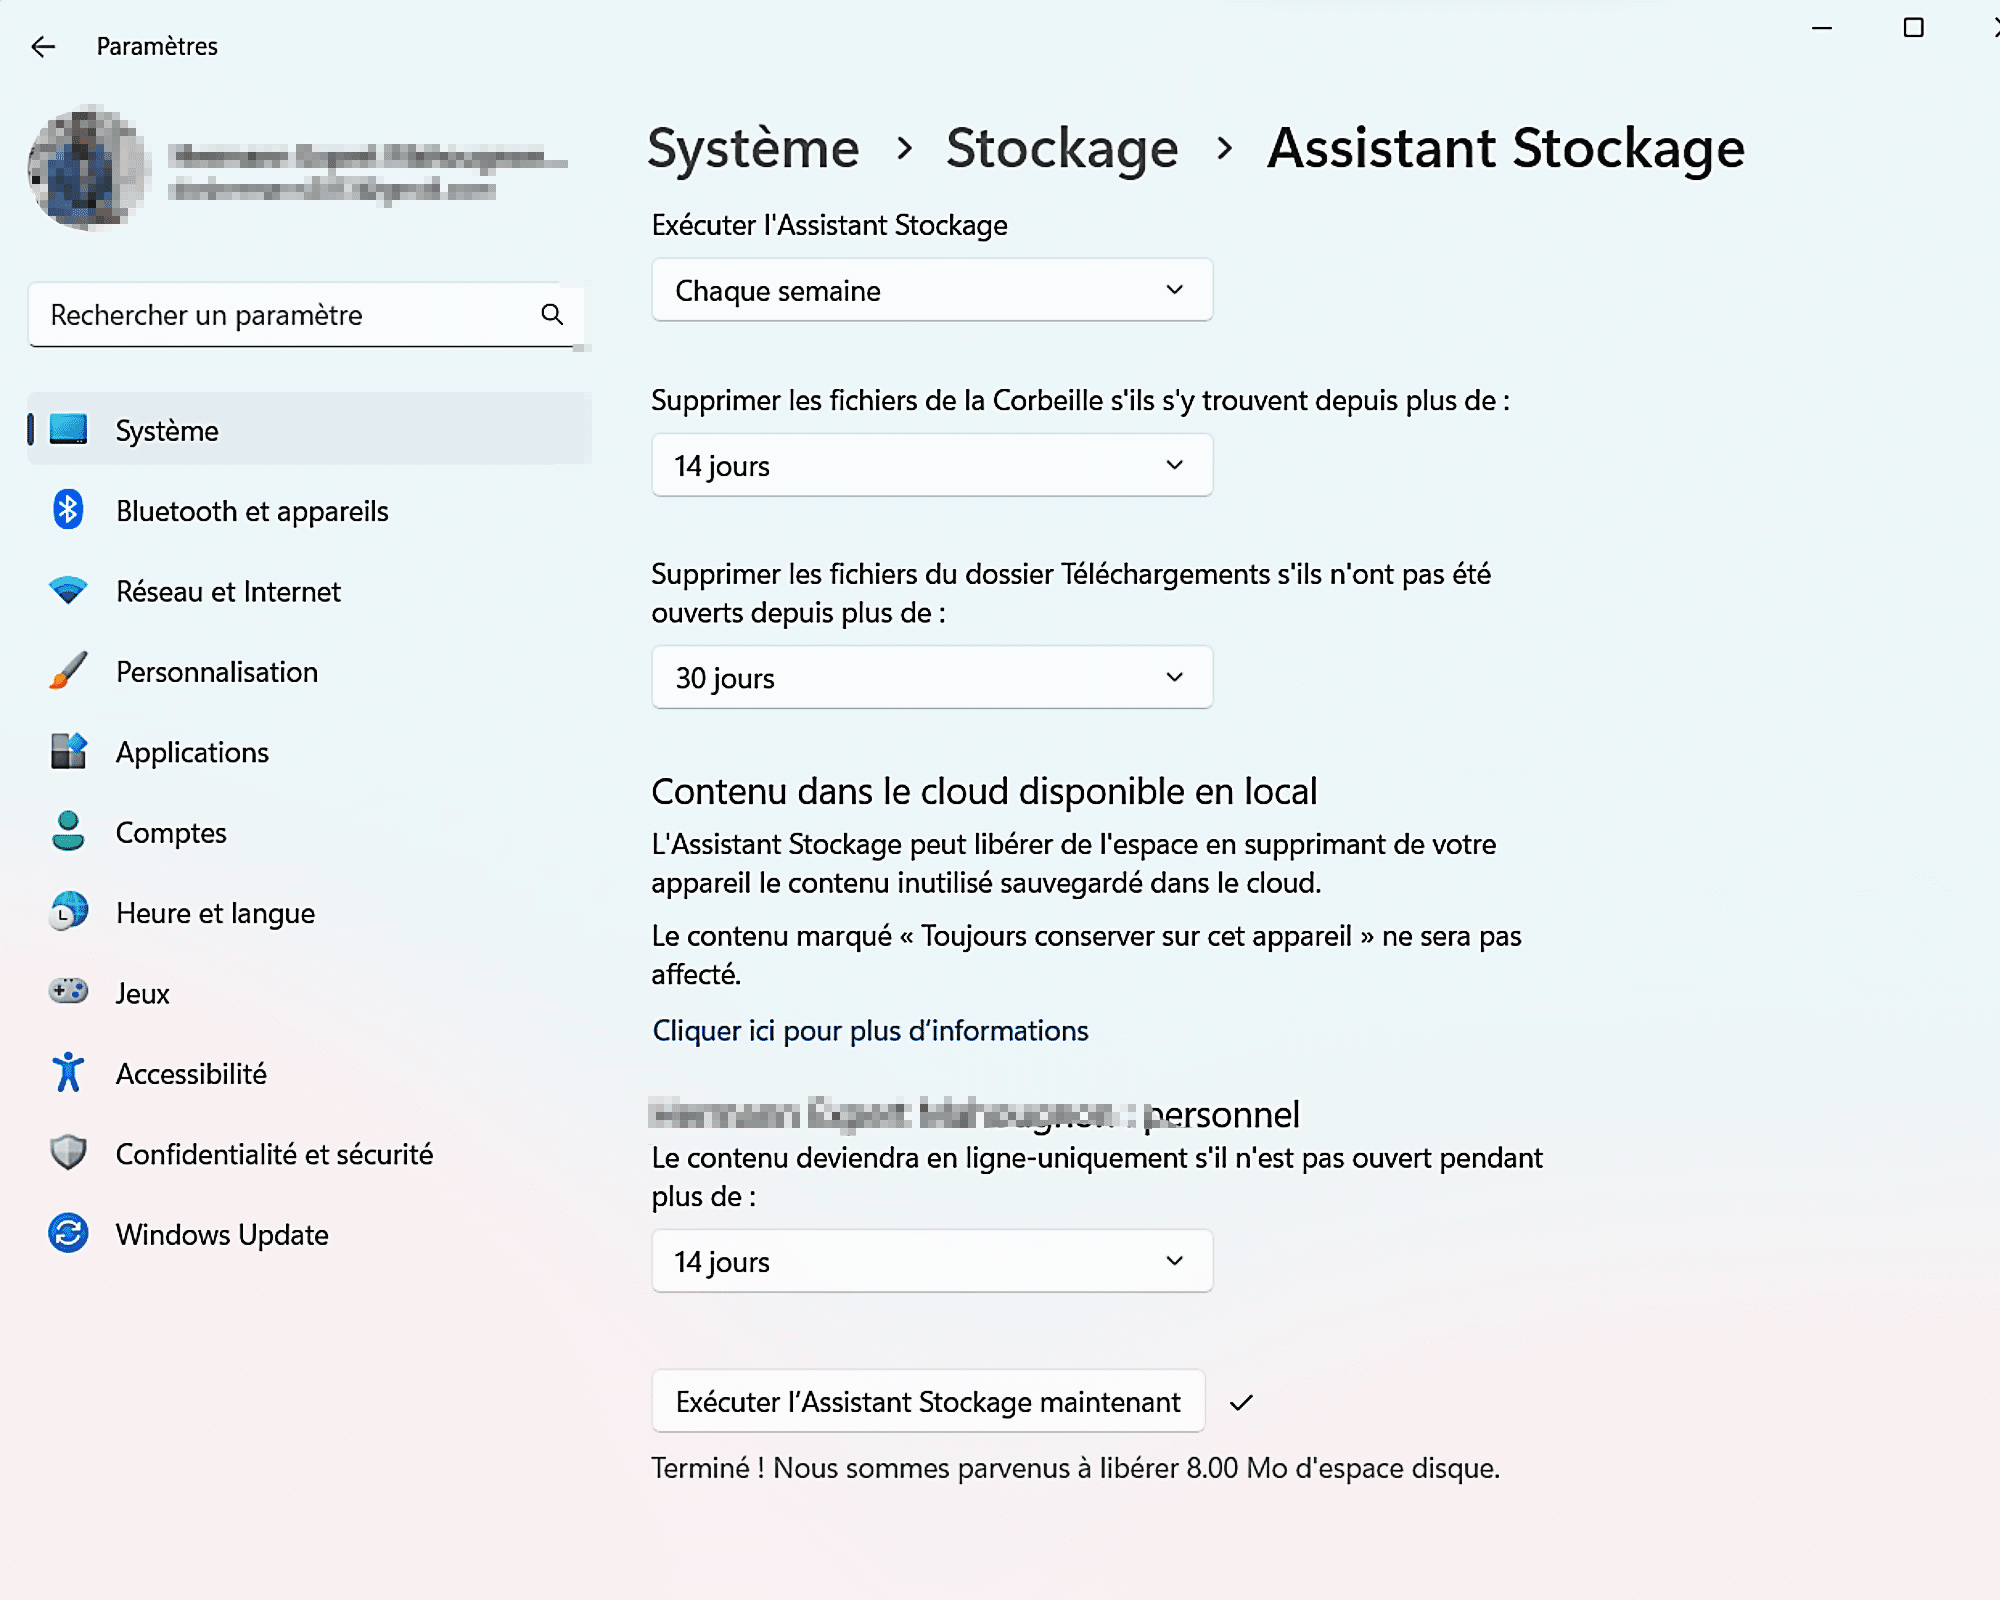
Congratulation ! You’ve just configured Windows 11 to free up space on your PC automatically.

“Organizer. Social media geek. General communicator. Bacon scholar. Proud pop culture trailblazer.”